Message from the developer
Ottavada is in the early stages of development.
That's why your feedback is very important. Send opinions, ideas, criticism or any other suggestion to ottavada@hotmail.com. It helps the project a lot.
Another very important thing: this documentation was designed to be as concise as possible, so read it all the way through to use the tool without confusion or headaches.
Essential concepts
How does it work?
Manage Mode
It is the computer responsible for adding, editing and removing songs, scores, categories, composers, arrangers, and sending backups to the cloud provider.
Cloud Provider
It is the intermediary between the computers. It receives the files sent by the Manage Mode and forwards them to the other computers.
View Mode
It is the computer used solely to consult the songs and scores allowed by the Manage Mode.
Limitations
More than one computer in Manage Mode
Ottavada was not designed to use two computers in Manage Mode at the same time, and there is no mechanism for it. If you need to use two Manage Modes (never simultaneously), you will need to import the backup from one to the other, a slow process.
This is an intentional architectural limitation: since Ottavada does not depend on a central server, there is no maintenance cost for the developer, which is why the tool can be completely free, with no subscription and nothing sold within it. A solution for this scenario is already being planned.
The View Mode does not have this limitation, as it is used only for reading and does not send anything to the cloud. You can have several computers in View Mode at the same time, without any problems.
Telemetry and privacy
To know how many people are using Ottavada, the app collects some usage data. No personal data is collected: neither your computer name nor your organization name. This data is used only for statistics, is stored encrypted, and is never shared or sold.
Songs and scores
Ottavada works based on what you already have organized on your computer. It does not create a new structure: it reads the one you already use.
The idea is simple:
- Each song is a folder.
- Each score is a file inside that folder.
When you point a folder to Ottavada, it indexes it, that is, it reads the folder and the files inside it to understand that folder is song X and each file is a score for an instrument. This is called indexing a folder (directory).
Ottavada has a system that suggests names for the song and instruments. For it to work, you need:
- The folder name to be the song name.
- The file name to be the instrument name.
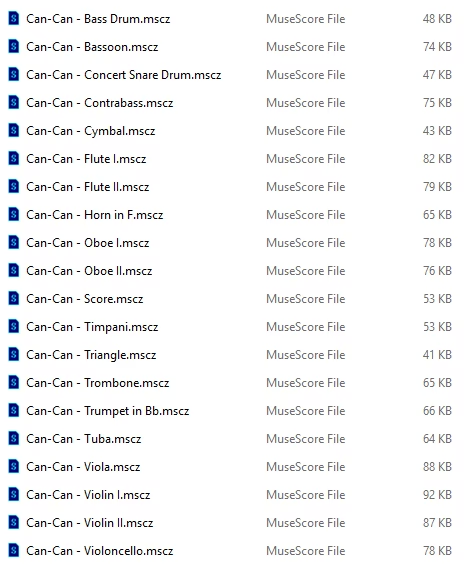
Example of a well-organized folder:
- Can-Can/
- Score.mscz or Can-Can - Score.mscz
- Flauta.mscz or Can-Can - Flauta.mscz
- Violino.mscz or Can-Can - Violino.mscz
- Cello.mscz or Can-Can - Cello.mscz
With this, the suggested song name is Can-Can and the instruments: score, flauta, violino and cello. If a valid instrument is not identified in the file name, the field is left blank and must be filled in manually.
The idea came from speeding up song registration in Ottavada, observing a pattern: song name in the folder and instrument name in the file.
Internally, the score with all instruments (called score or grade) is also treated as an instrument. It always appears at the top of the list inside a song.
Rules
Ottavada applies some rules to keep the library organized and avoid conflicts. They are:
Song and Score Status
Every song and score has a status that defines what will or will not be sent to the View Mode.
Song status:
- Send allowed: the song is sent to the View Mode and has at least one instrument with status send allowed.
- Send not allowed: the song is not sent to the View Mode. It has no score with status send allowed, but has at least one score with status send not allowed.
- No score: the song is not sent to the View Mode and has no available score. This happens when the folder or files are not found, or when all the scores have status ignored.
Score status:
- Send allowed: the score is sent to the View Mode.
- Send not allowed: the score is not sent to the View Mode.
- Ignored: the score is ignored by Ottavada, as if it didn't exist.
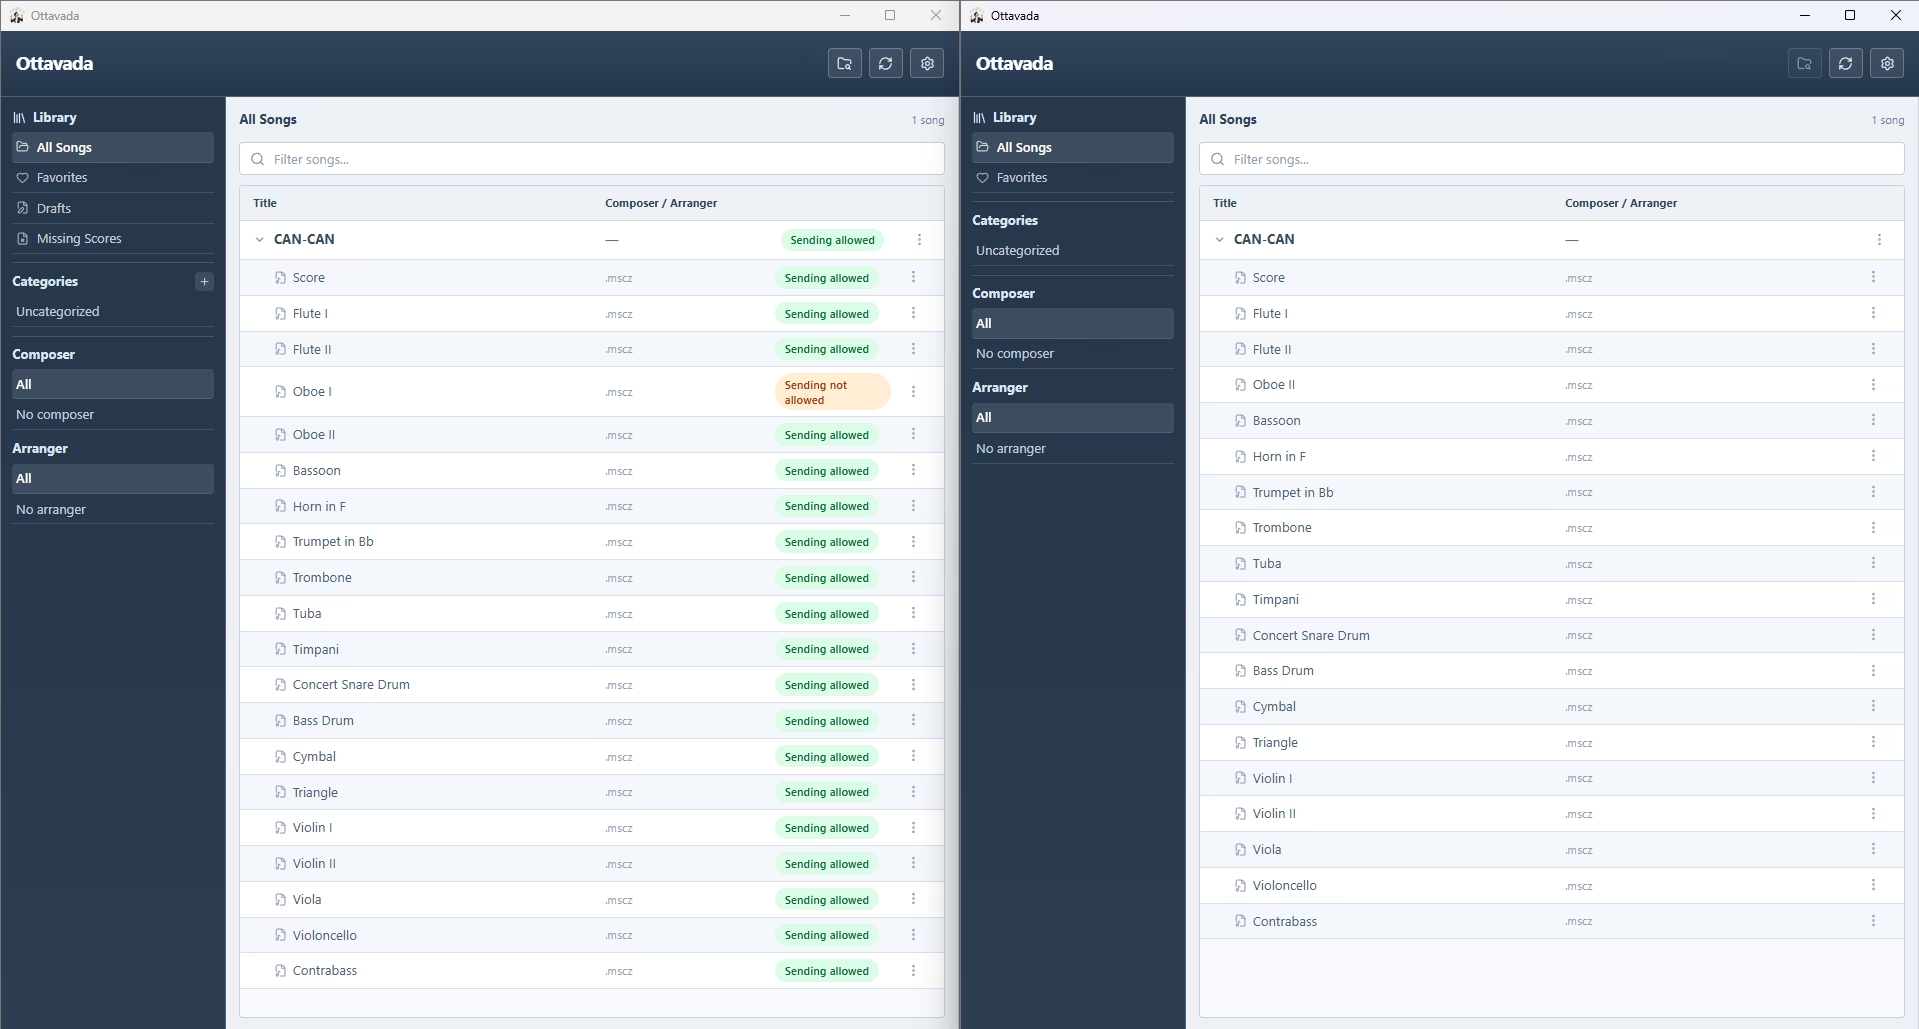
By clicking on the image, you can view it full screen.
Example: In the image below, the Manage Mode (left) has a song whose Oboe I score has status send not allowed. Note that on the View Mode (right), that song does not appear.
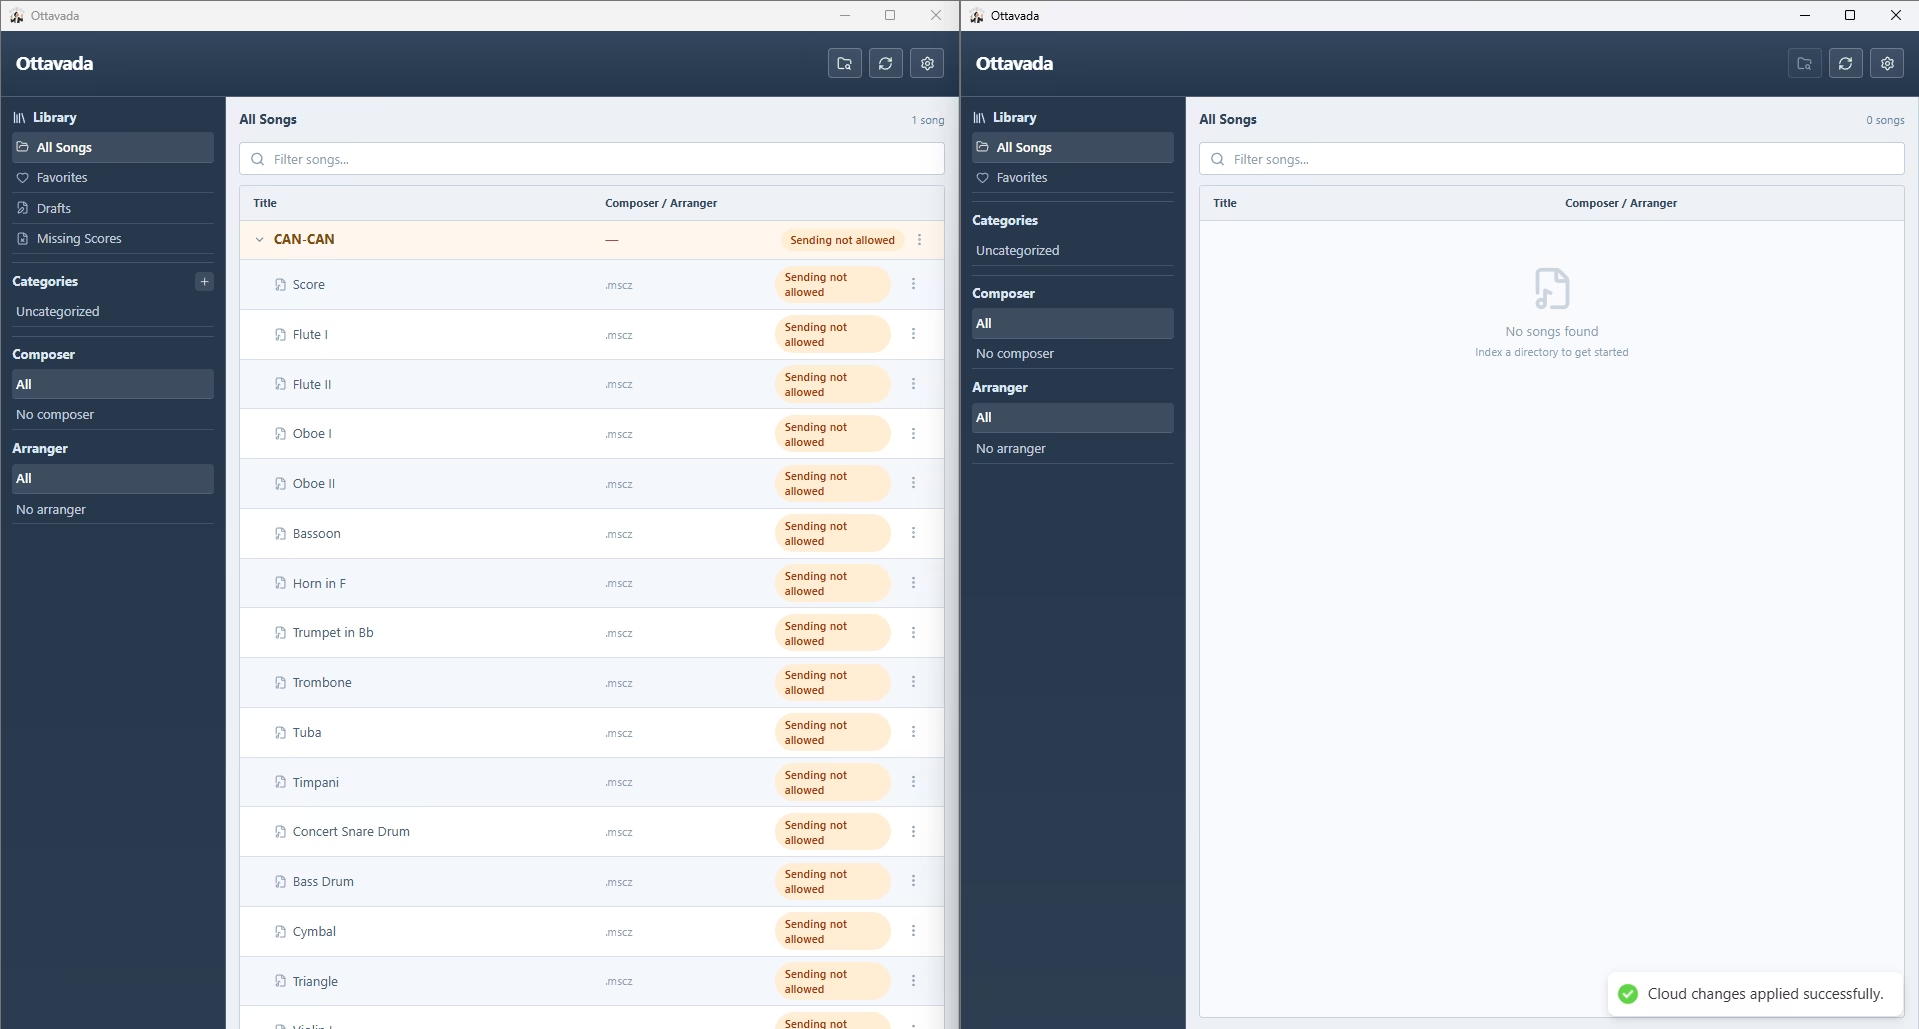
Likewise, if the whole song has status send not allowed, it will also not appear on the View Mode.
No duplicates
Songs with the same name: you can have songs with the same name, as long as they have a different composer or arranger. Example: "Can-Can" with no composer, "Can-Can" with composer X and "Can-Can" with composer X and arranger Y are considered different songs. Two songs with the same name, same composer and same arranger are duplicates.
Scores with the same name: it is not allowed to have the same instrument twice in the same song. You need to differentiate them, e.g.: Violino I and Violino II or Violino and Violino (Solo). Files with different extensions, e.g.: Violino.mus and Violino.pdf, are also considered duplicates.
Score name normalization
When normalizing a score name, leading digits and whitespace are removed, because they represent the file's ordering prefix and are not part of the instrument name. Examples: `00001 Flauta 1` becomes `Flauta 1`, `2 Flauta` becomes `Flauta`, and `Trompete 3I` stays `Trompete 3I`.
Installation
Windows
On the home page, click Download for Windows.
The "ottavada.cmd" file will be downloaded; when you click it, a warning will appear, but just click Run.
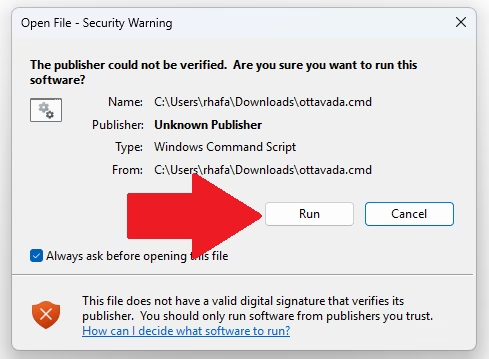
The installation script will open, detecting your operating system and installing Ottavada accordingly.
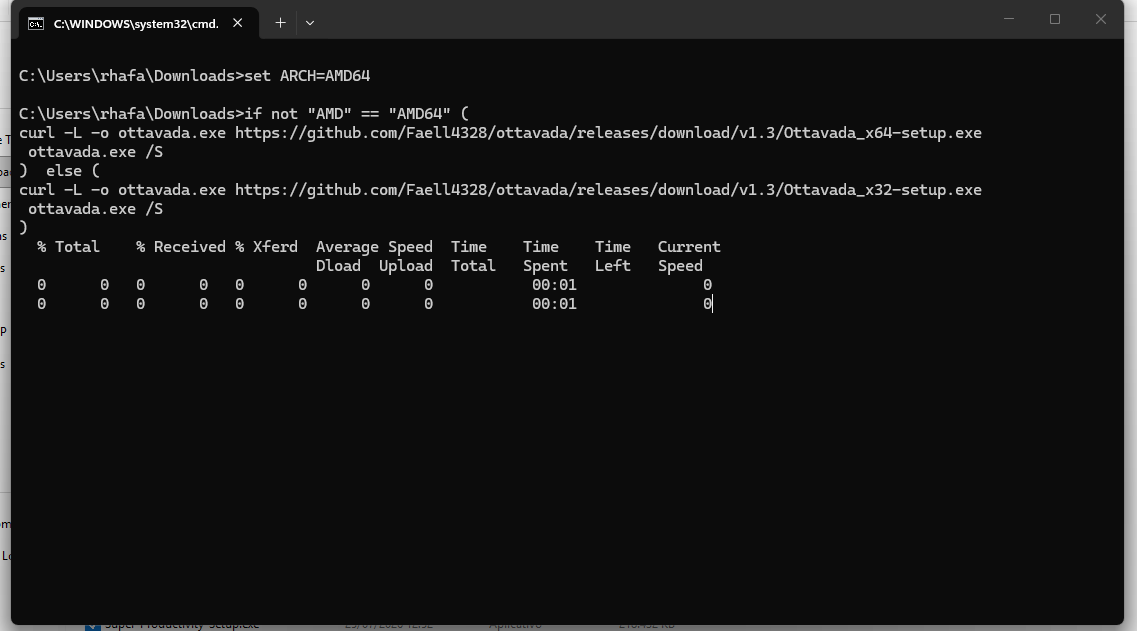
After installation, Ottavada will start.
Linux
On the home page, click Download for Linux to download the ottavada.sh file. This script installs the dependencies, installs the Ottavada .AppImage and adds it to the system. In the terminal, inside the folder where the file was downloaded, run:
sudo chmod +x ottavada.sh./ottavada.sh
Some distributions are easier, such as Zorin OS and BigLinux, which already have an app that installs Ottavada automatically.
macOS
On the home page, click Download for MacOS to download the universal .dmg file (compatible with both Intel and Apple Silicon processors). When you open it, you'll see the Ottavada icon. Drag it to the Applications folder.
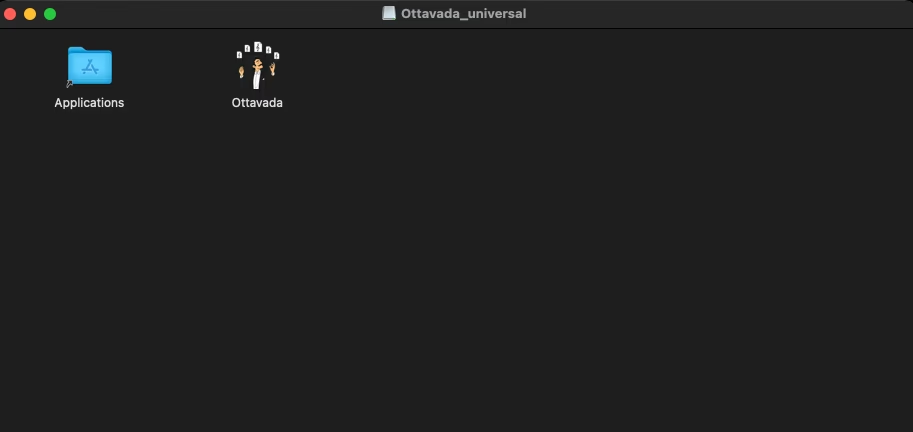
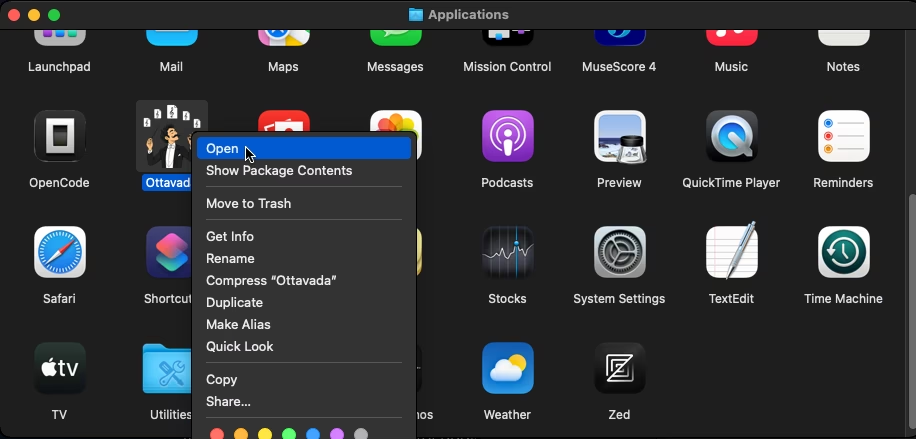
After dragging the icon to Applications, Ottavada is installed. The first time, right-click the Ottavada icon and select Open. After that, you can open it normally with a double-click.
First steps
When you open Ottavada for the first time, the configuration step will start.
Step 1: Select Language
Here you select the language you want Ottavada to use. The app suggests a language based on your computer's settings, but you can change it to your preference.
Step 2: Usage mode
Here you select the usage mode. There are two:
- Manage Mode: responsible for adding, editing and removing songs and scores, controlling what goes or doesn't go to the other computers.
- View Mode: used only for reading the songs and scores that the Manage Mode has made available.
Step 3: Computer Name and Organization or Institution Name
Here you just enter your computer name (for example: "Home Computer" or "Orchestra Computer") and, in the other field, the name of the orchestra, band, institution or just a name for personal use.
Step 4: Cloud Provider Configuration
Ottavada supports Koofr (recommended), Google Drive, Dropbox, OneDrive and pCloud, plus an advanced mode with SFTP and WebDAV for those who want to use their own server. Koofr is recommended because it is much faster than Google Drive, but, on the other hand, it is more cumbersome to set up.
You must use the same cloud provider account on the other computers with Ottavada. This is necessary so that all of them can access the same files.
Koofr
If you don't have an account, go to: Koofr or search for koofr on Google. I recommend creating the account through Google: the process is faster.
Logged into Koofr and on the Drive home page, click in the upper right corner and select Preferences.
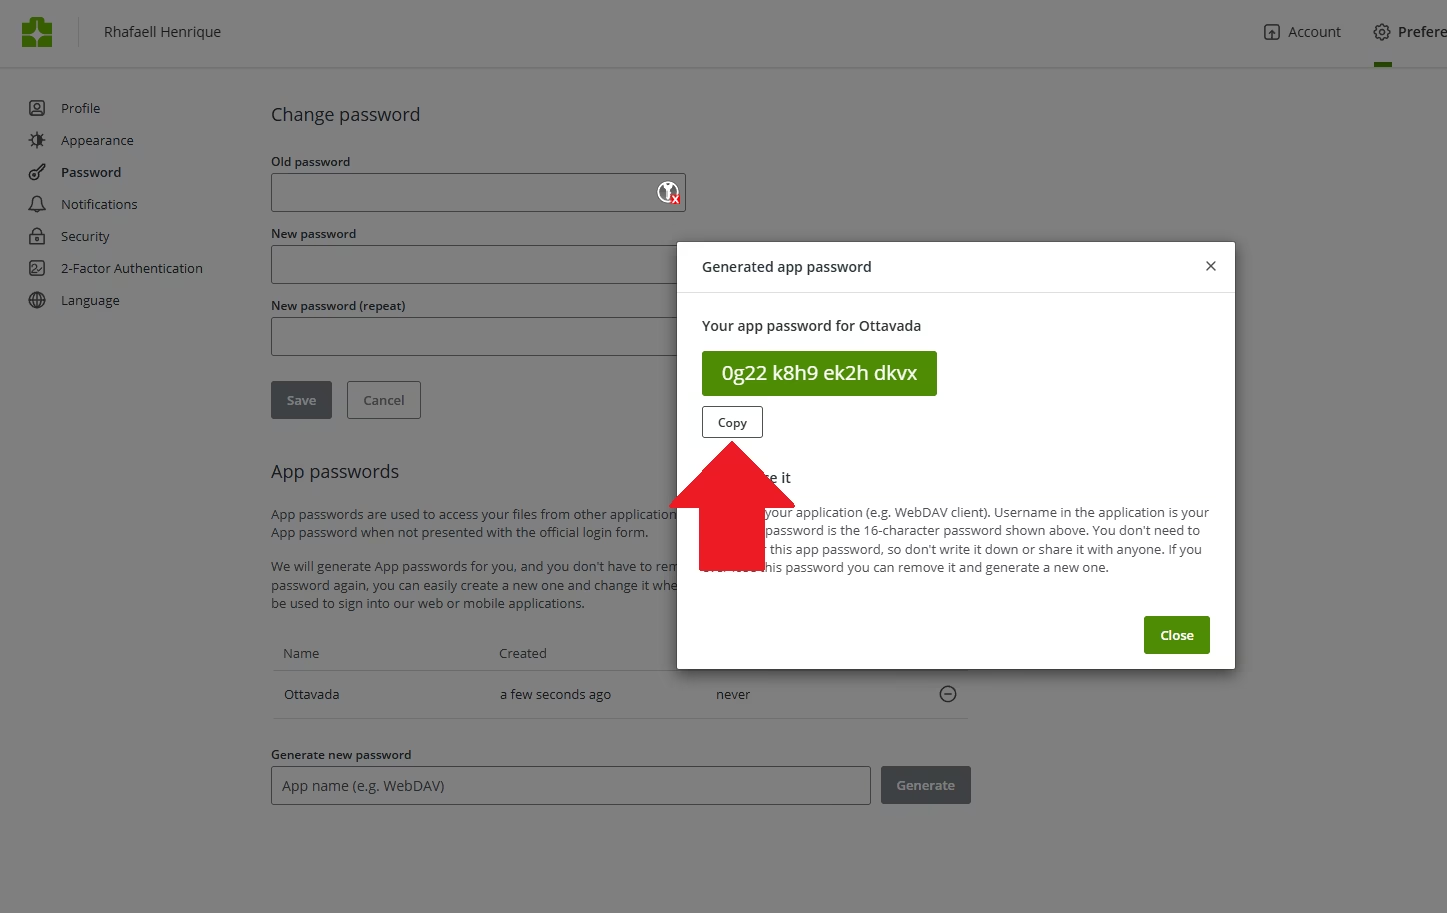
Go to Password. Under App Passwords, enter a name (for example: "Ottavada") and click Generate.
A pop-up will open with your generated password; click the Copy button.

I recommend saving this password: it will be used on your other computers with Ottavada.
Back in Ottavada, enter the email you used to access Koofr (if you signed up with Gmail, use the same Gmail email) and then the password you copied.
Google Drive
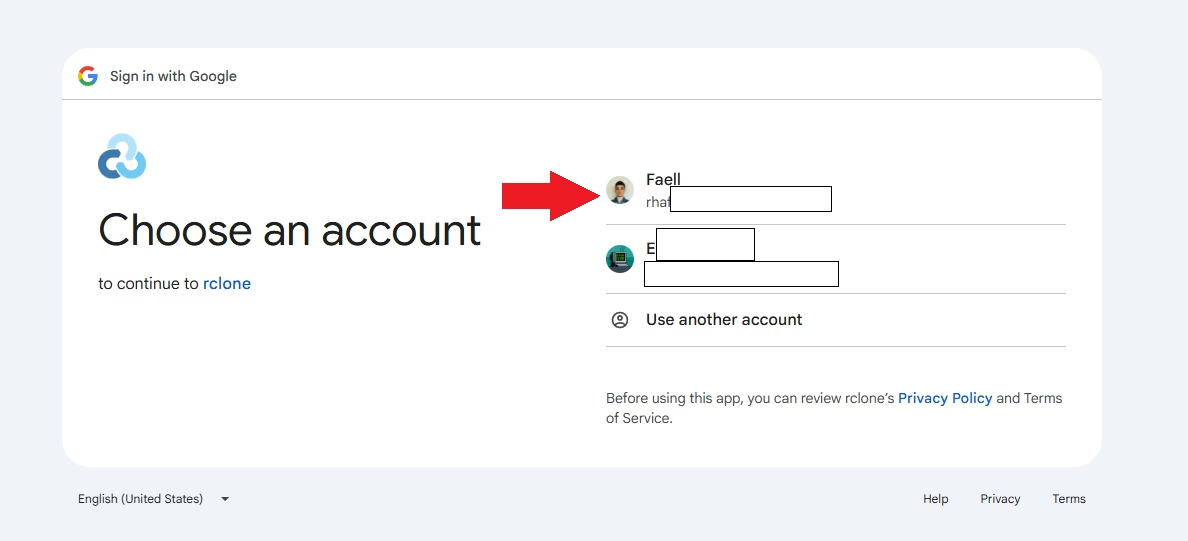
This is much simpler than Koofr, but, on the other hand, it is much slower. Just click the Configure and test Google Drive button. Your browser will open so you can select an account and you're done.
Dropbox, OneDrive and pCloud
These providers use browser authentication (OAuth), just like Google Drive. Simply select the provider, click Configure and test and authorize access to the account you want to use.
Advanced mode: SFTP and WebDAV
For those who want to use their own server, Ottavada offers SFTP and WebDAV. In this mode, you enter the server address and access credentials.
Step 5: Review of information
And finally, we have the information review screen, showing the computer name, the orchestra or institution name, the usage mode, and the cloud provider.
Adding music
As explained in Essential concepts, Ottavada indexes folders and suggests names based on the pattern: song name in the folder and instrument name in the file.
Folder and files from the example:
Folder:
Files inside the folder:
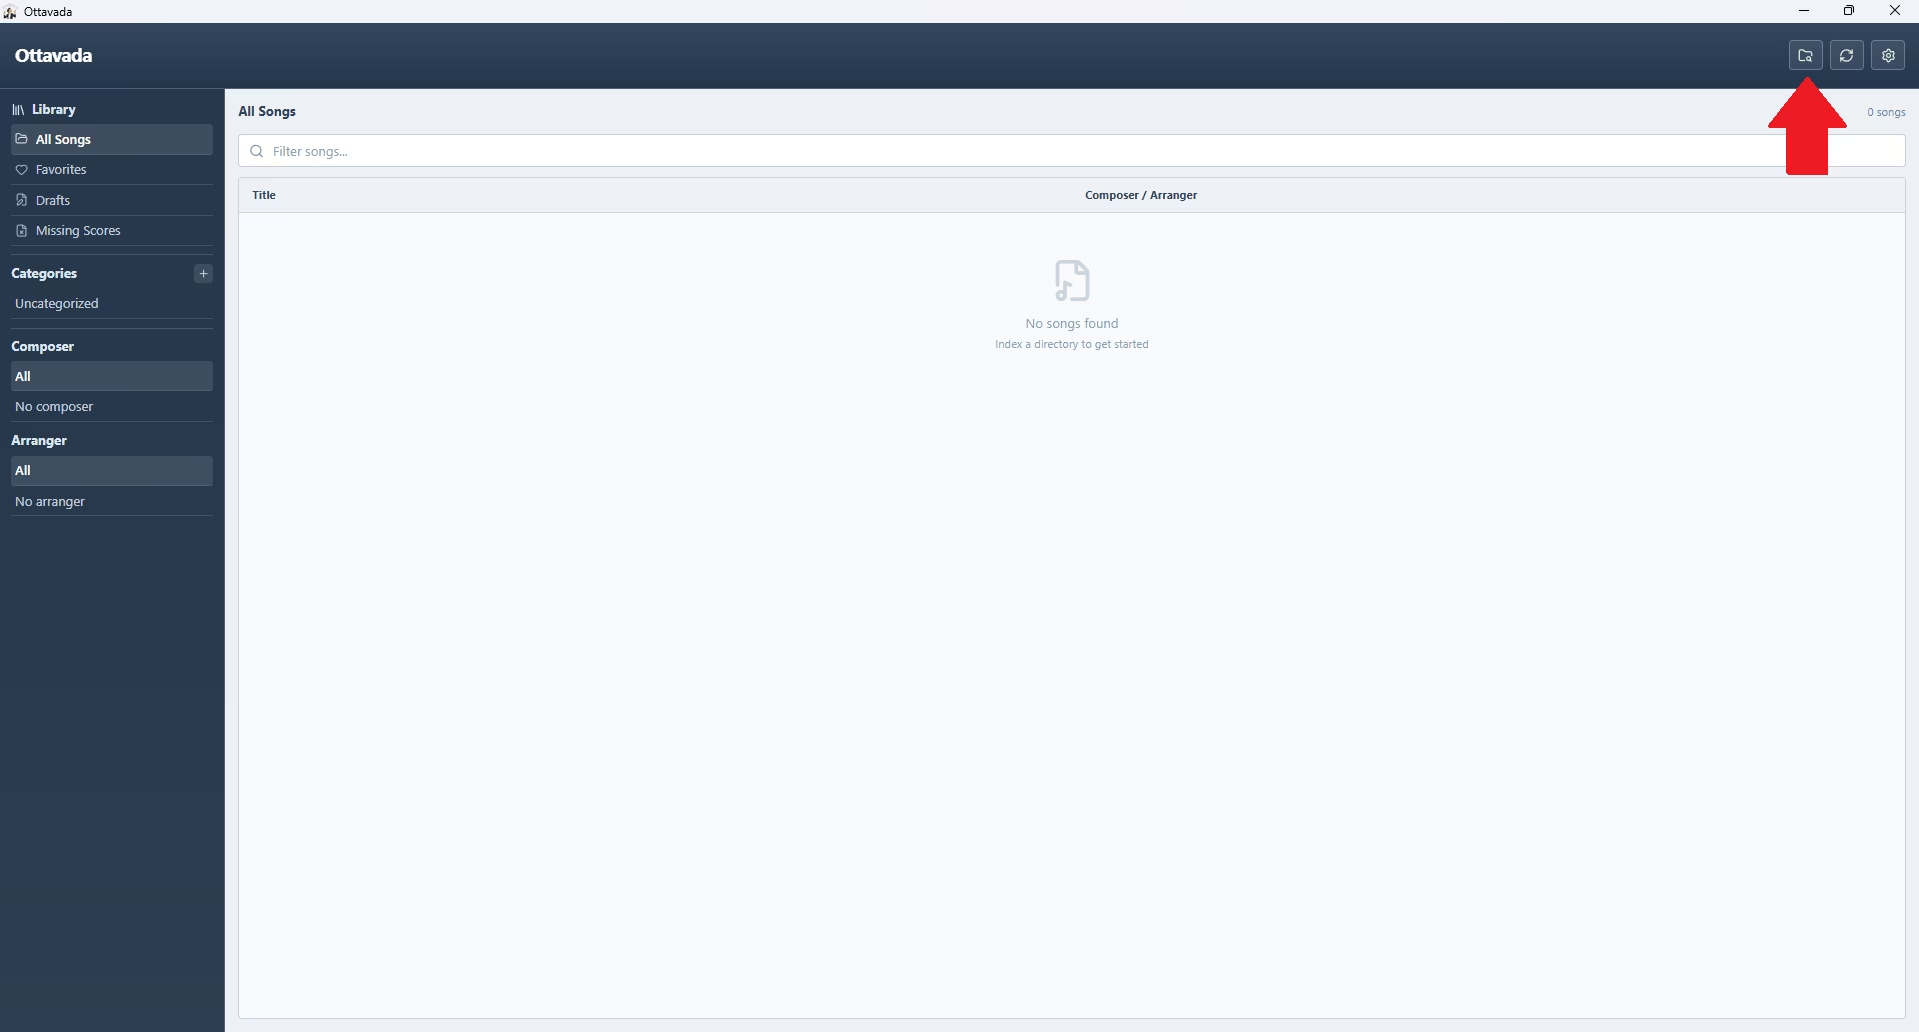
In practice, the process is simple: to index a directory, click the folder-with-magnifying-glass icon, in the top right.
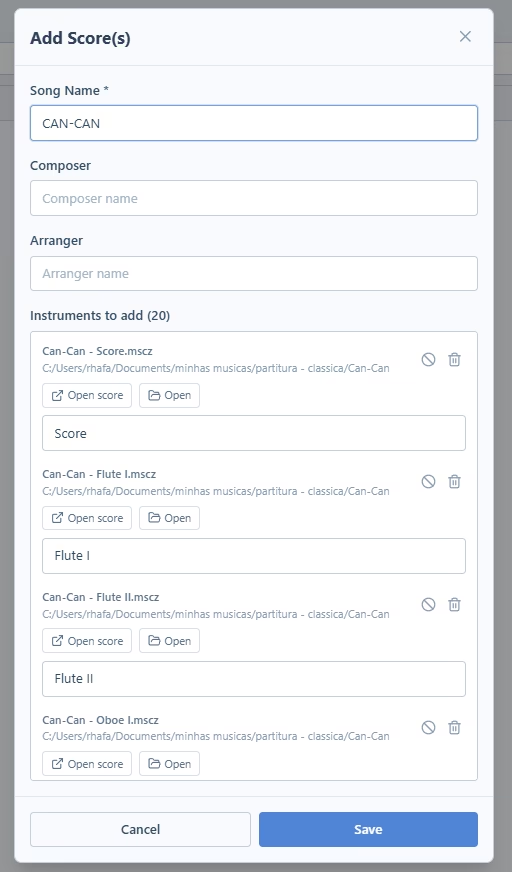
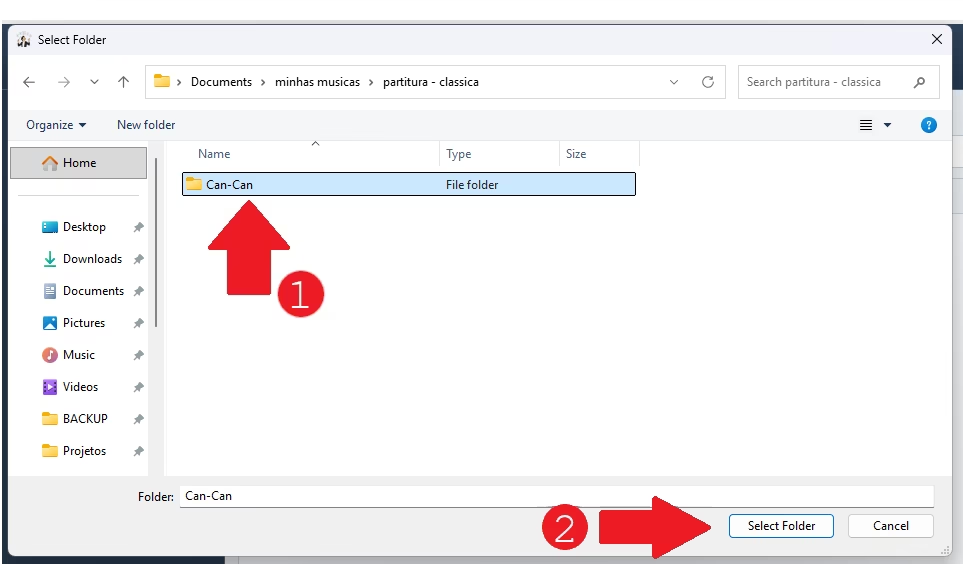
When you click, the File Explorer will open. Navigate to the folder with the scores, select it and click Select folder.
In the File Explorer you can select more than one directory at a time. It is recommended to select several folders inside a larger folder, so they are all indexed at once.
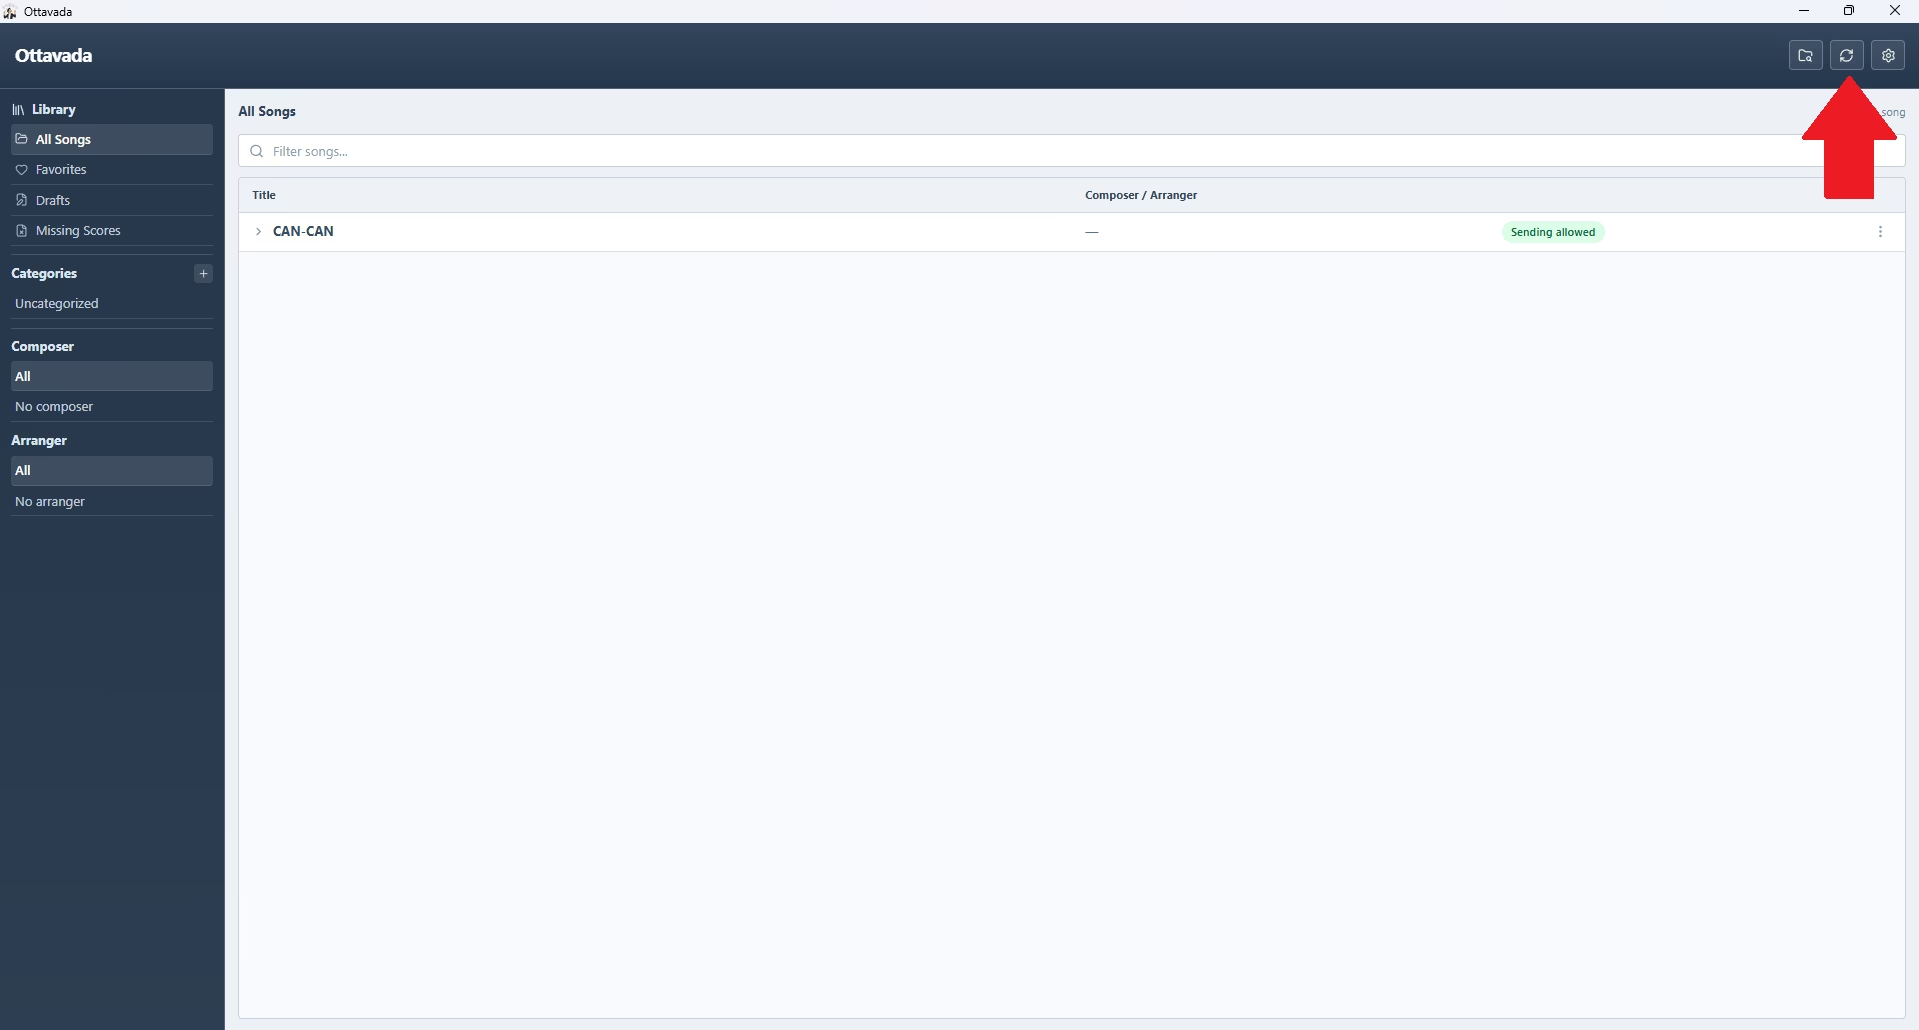
A modal will appear with the fields Song Name, Composer Name, Arranger Name and the instruments. Each file is considered an instrument by Ottavada. So even though the score with all instruments together is not a specific instrument, it is considered an instrument with names like Score, Grade or others.
The name you give the song or instrument in Ottavada does not change the original file name on your computer.
Sending to the cloud
After adding your songs, it's time to send them to the cloud provider, and the process is quite simple. Just click the sync icon (two arrows forming a circle), located next to the add-score button.
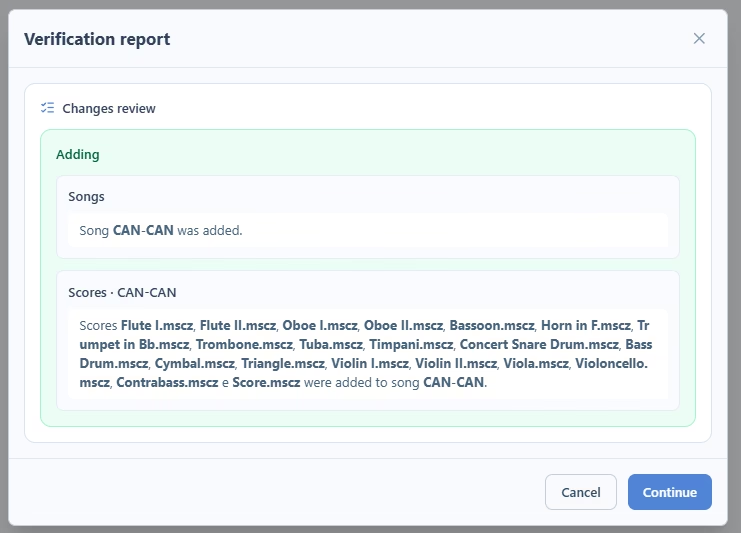
When you click the sync icon, Ottavada scans all the songs and scores you have added, modified or removed, and opens the report modal. In the example, only one song and a few instruments were added, so the image only shows that, but if there were other changes they would also appear.
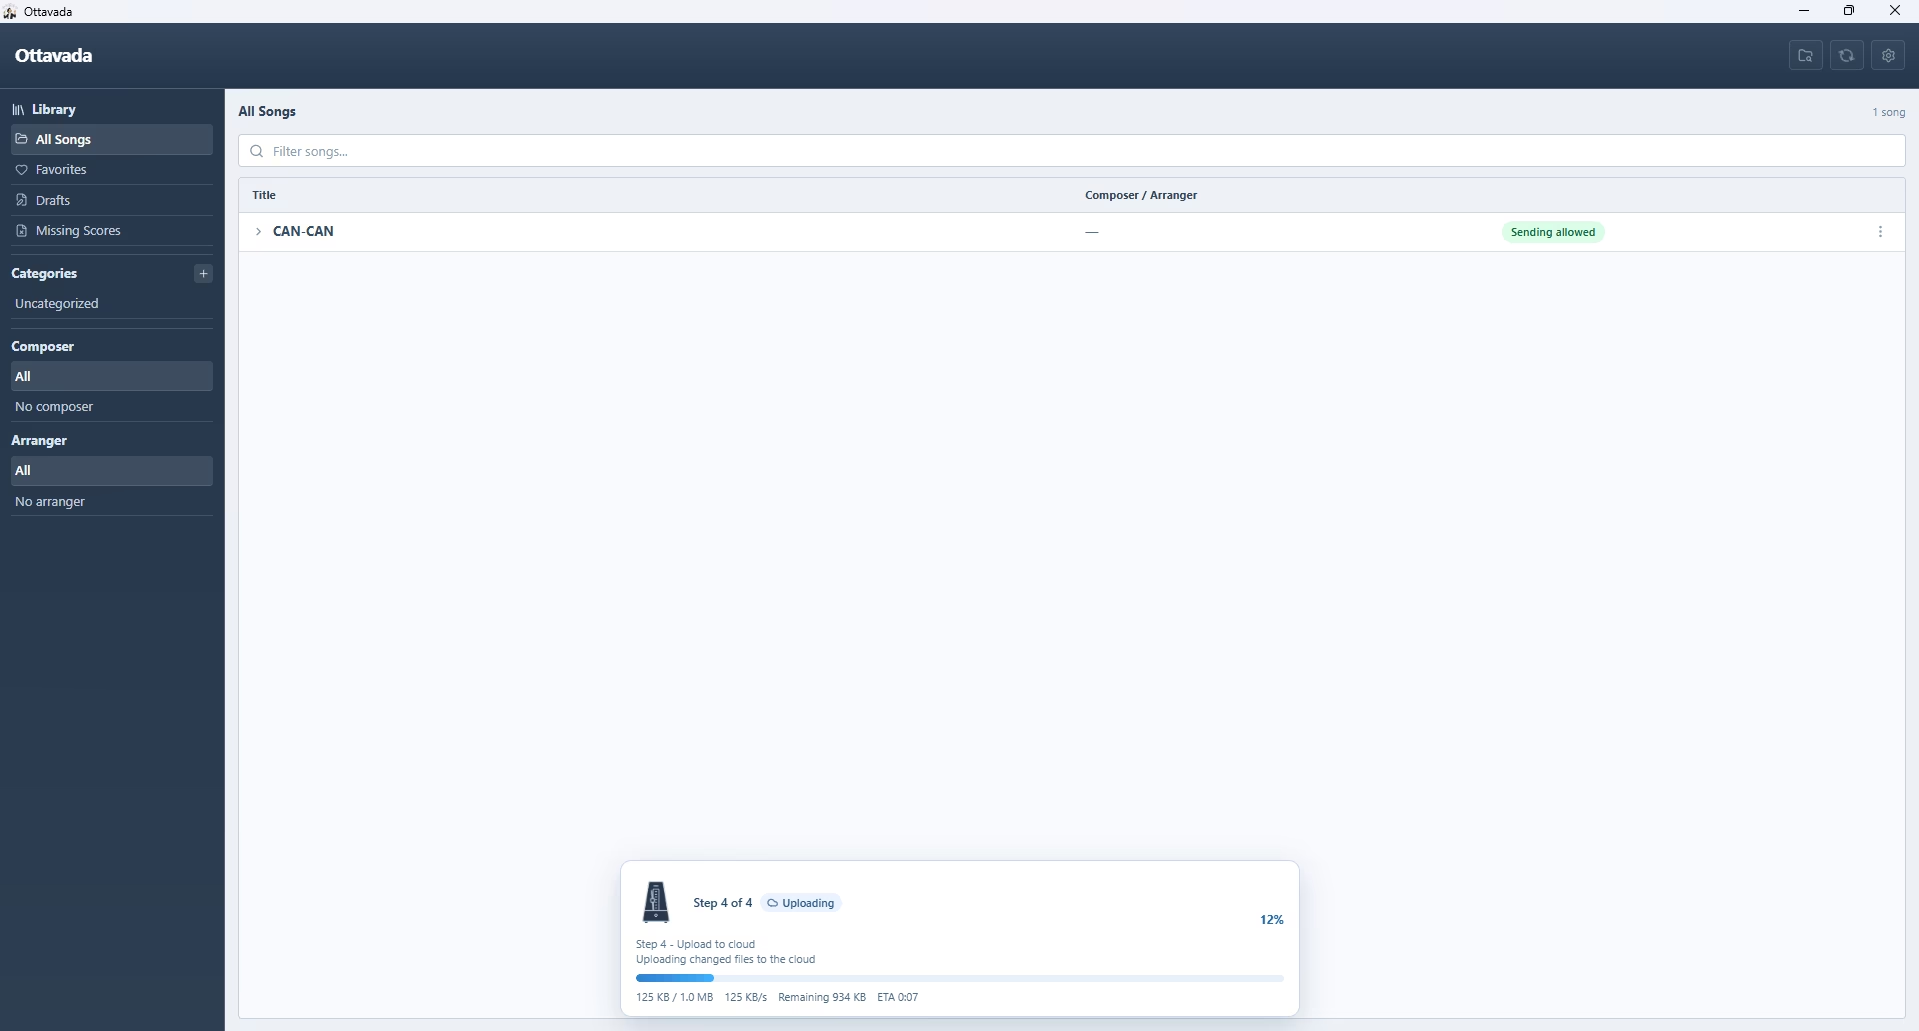
The upload to the cloud is only actually performed after you click continue. When you do, a progress bar will appear showing the upload progress for songs and scores.
Always review carefully before clicking continue. The changes listed in the report are exactly what will be sent to the cloud.
If you spot any problem, for example, a wrong song status, click cancel, fix what is needed and click the sync icon again.
Making changes
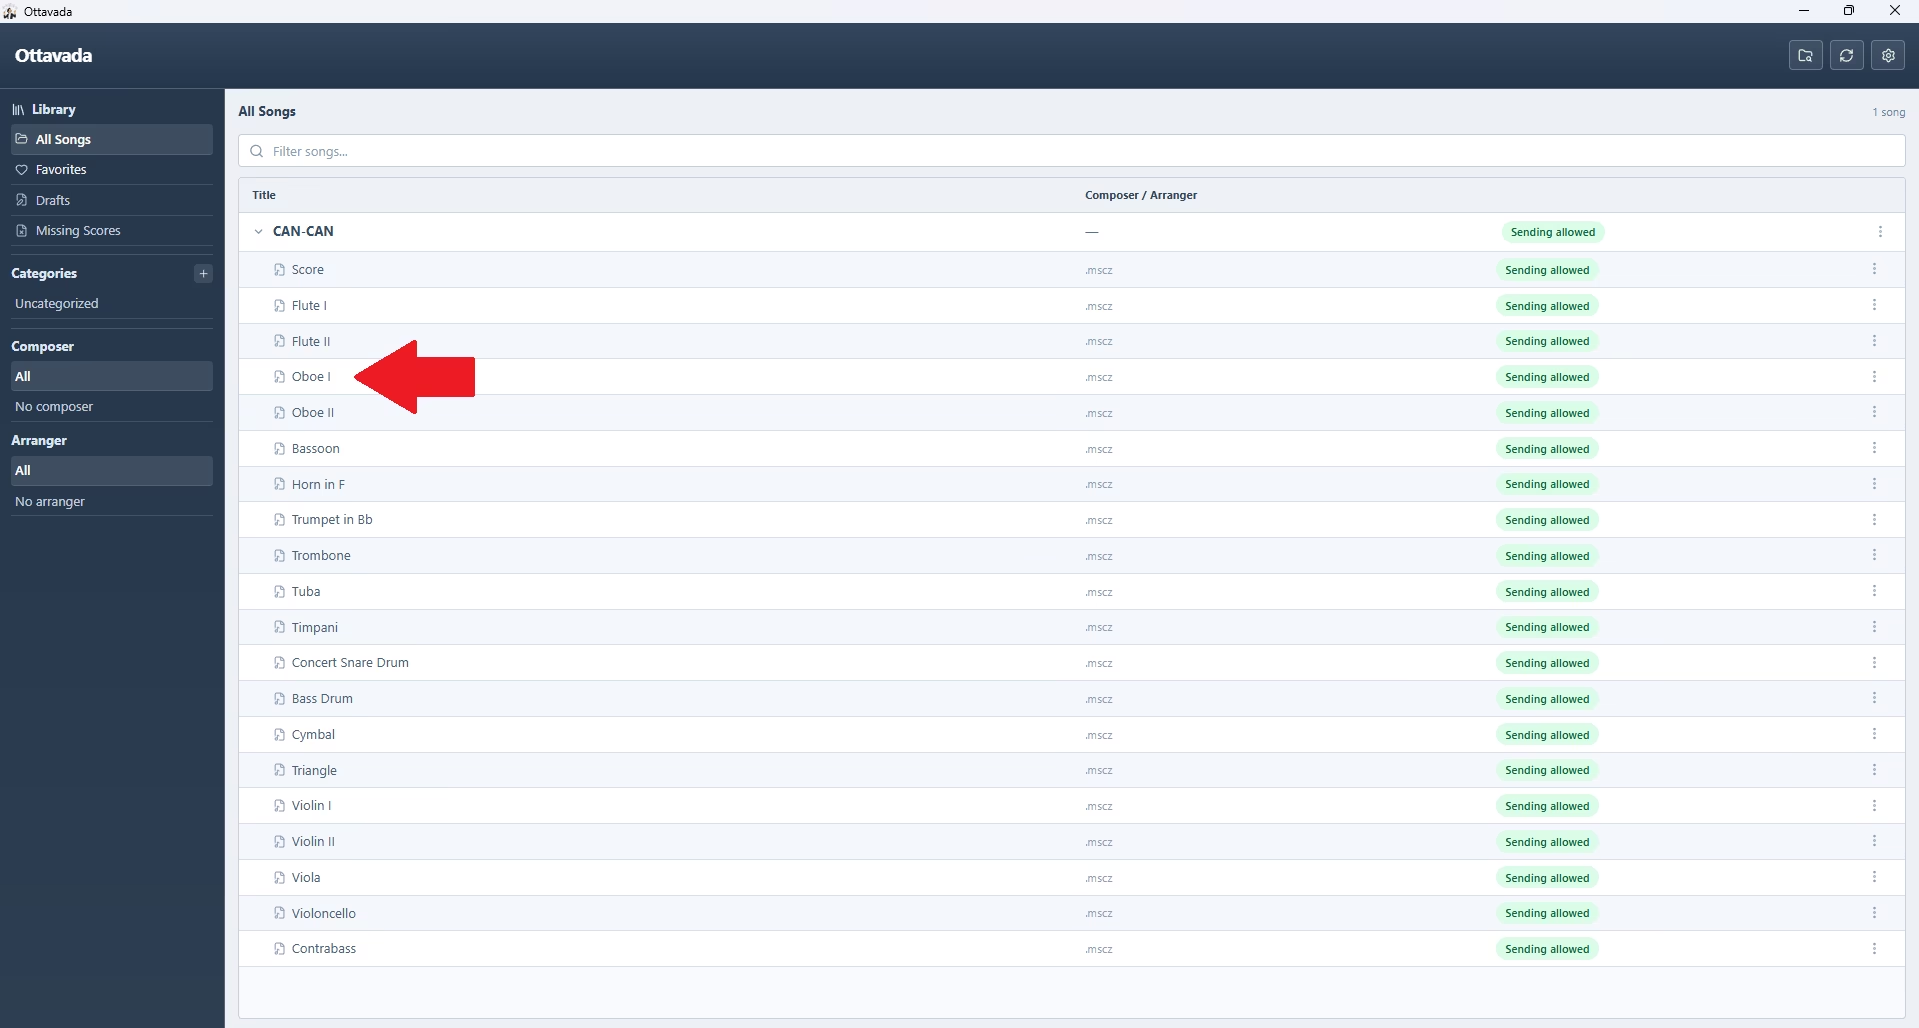
Example: we need to change the Oboe I score. Open the song by clicking on it and double-click the Oboe I score.
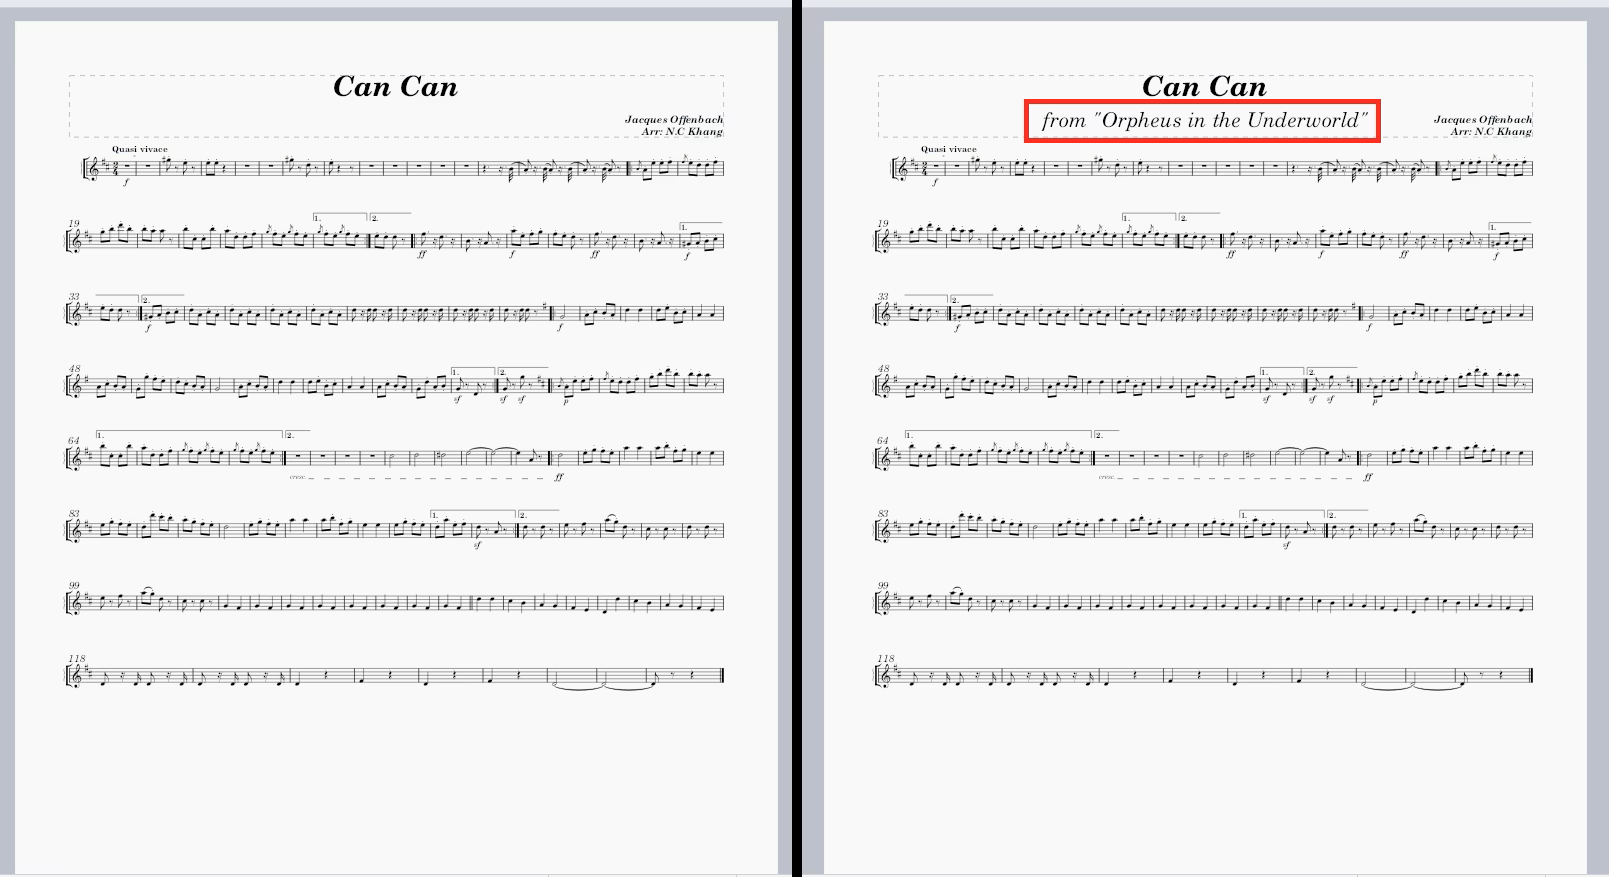
In this case, it is a .mscz file, which opens on your computer with MuseScore. On the left is the score before the change, and on the right the modified one (the section marked in red was added).
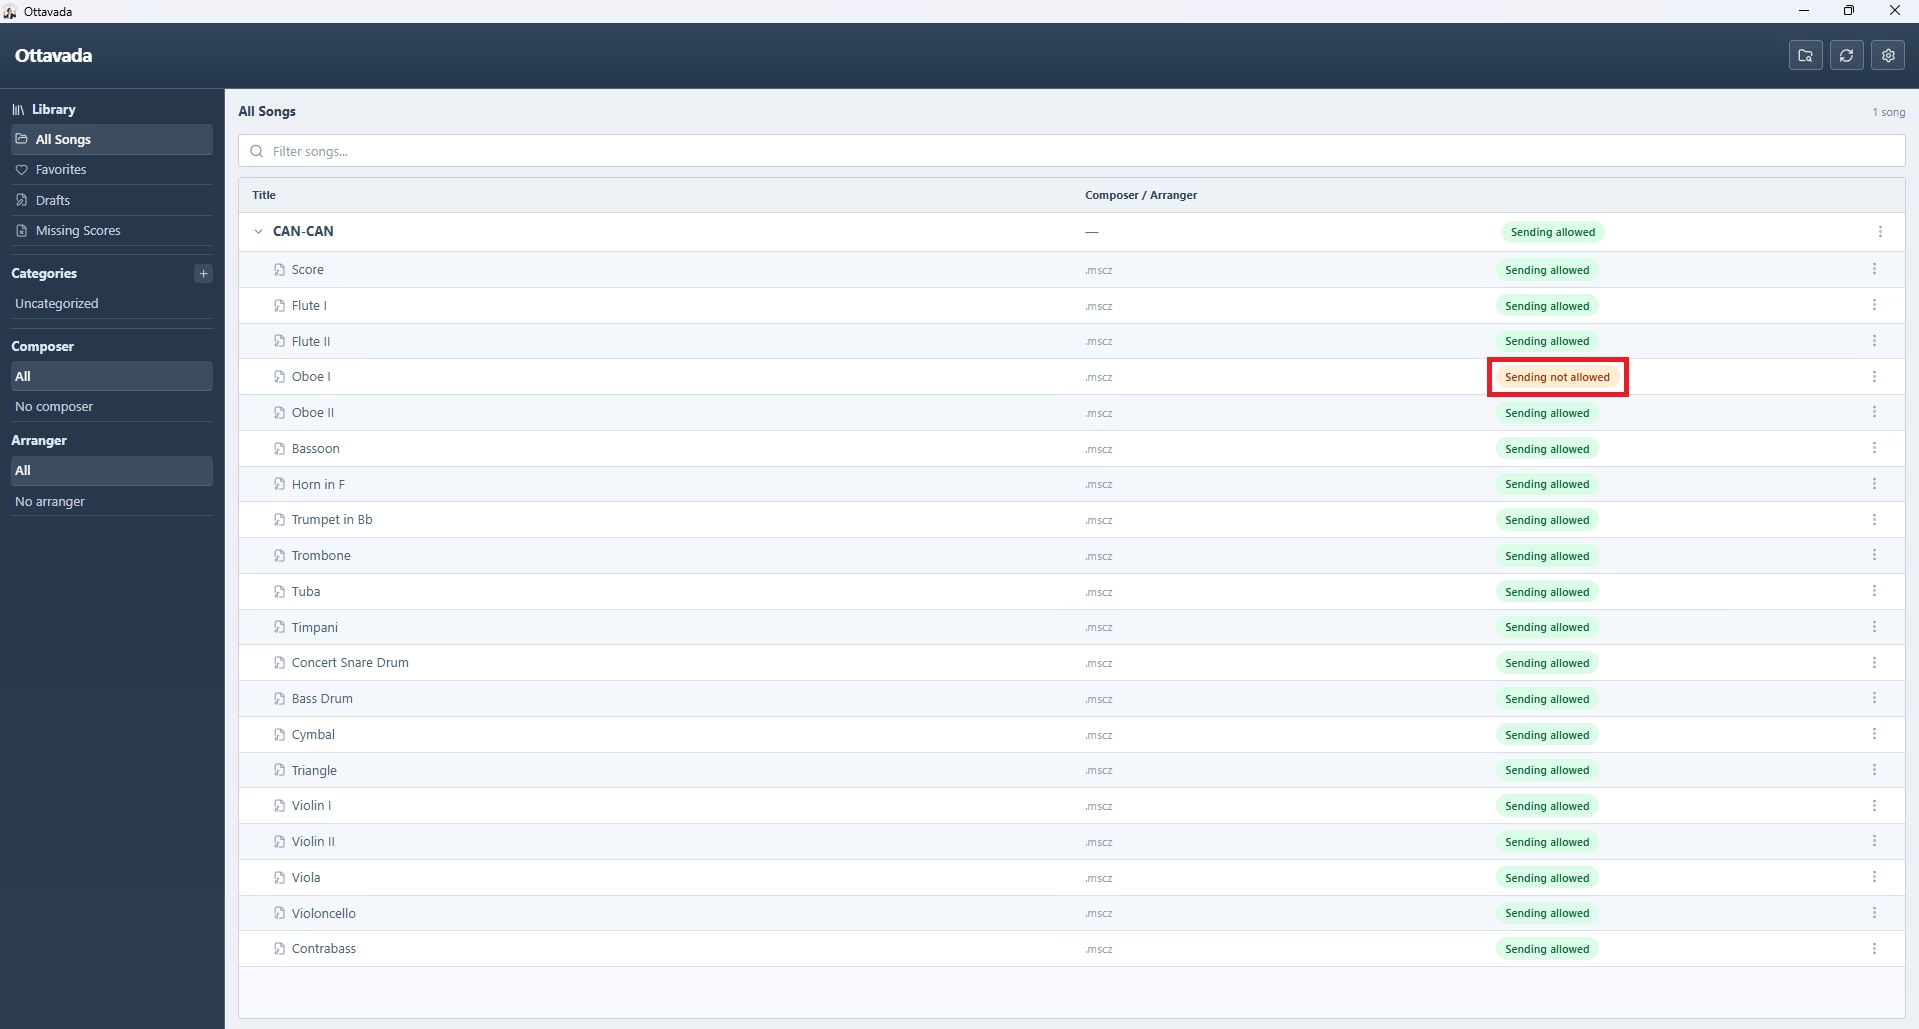
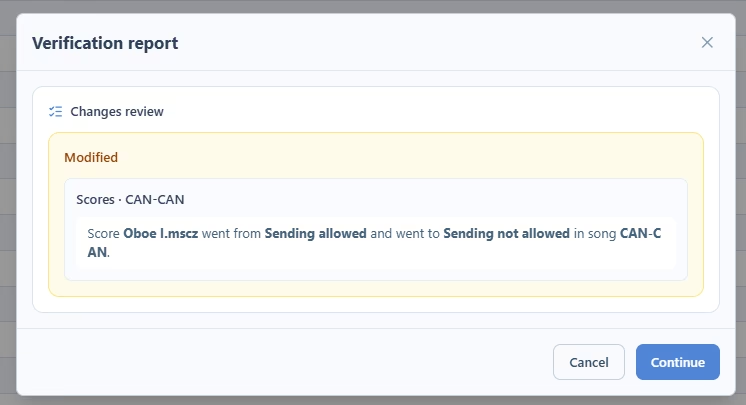
After making the change, click the sync icon (two arrows forming a circle). The report will show that the file was changed and the status will change to send not allowed.
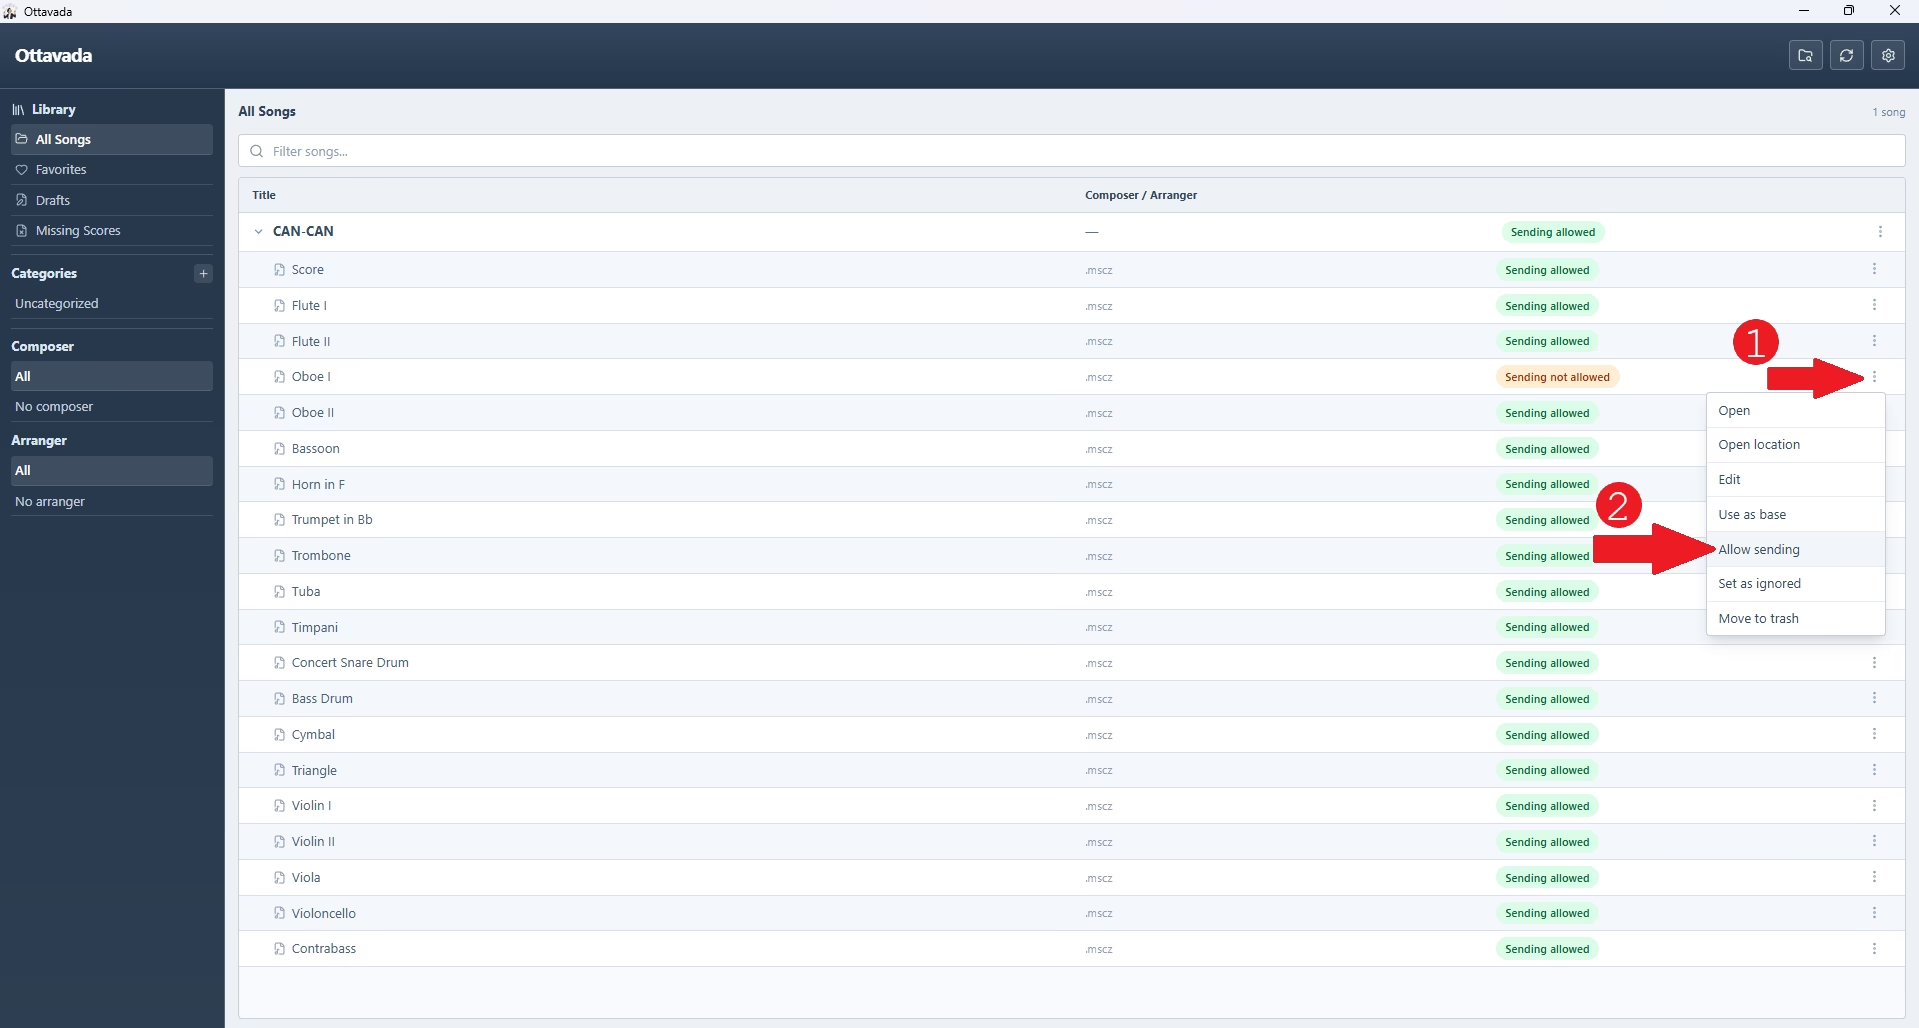
In the report, each changed score appears in the changed section with a status selector, letting you choose how it should be treated without leaving the modal.
Change ready to send
If the change is ready, choose send allowed in the status selector so the score keeps being sent. Then click continue and it will be sent to View Mode.
Change not ready yet
If the change is not ready yet, keep send not allowed in the selector and click continue. The score will be sent with status send not allowed and will not appear in View Mode.
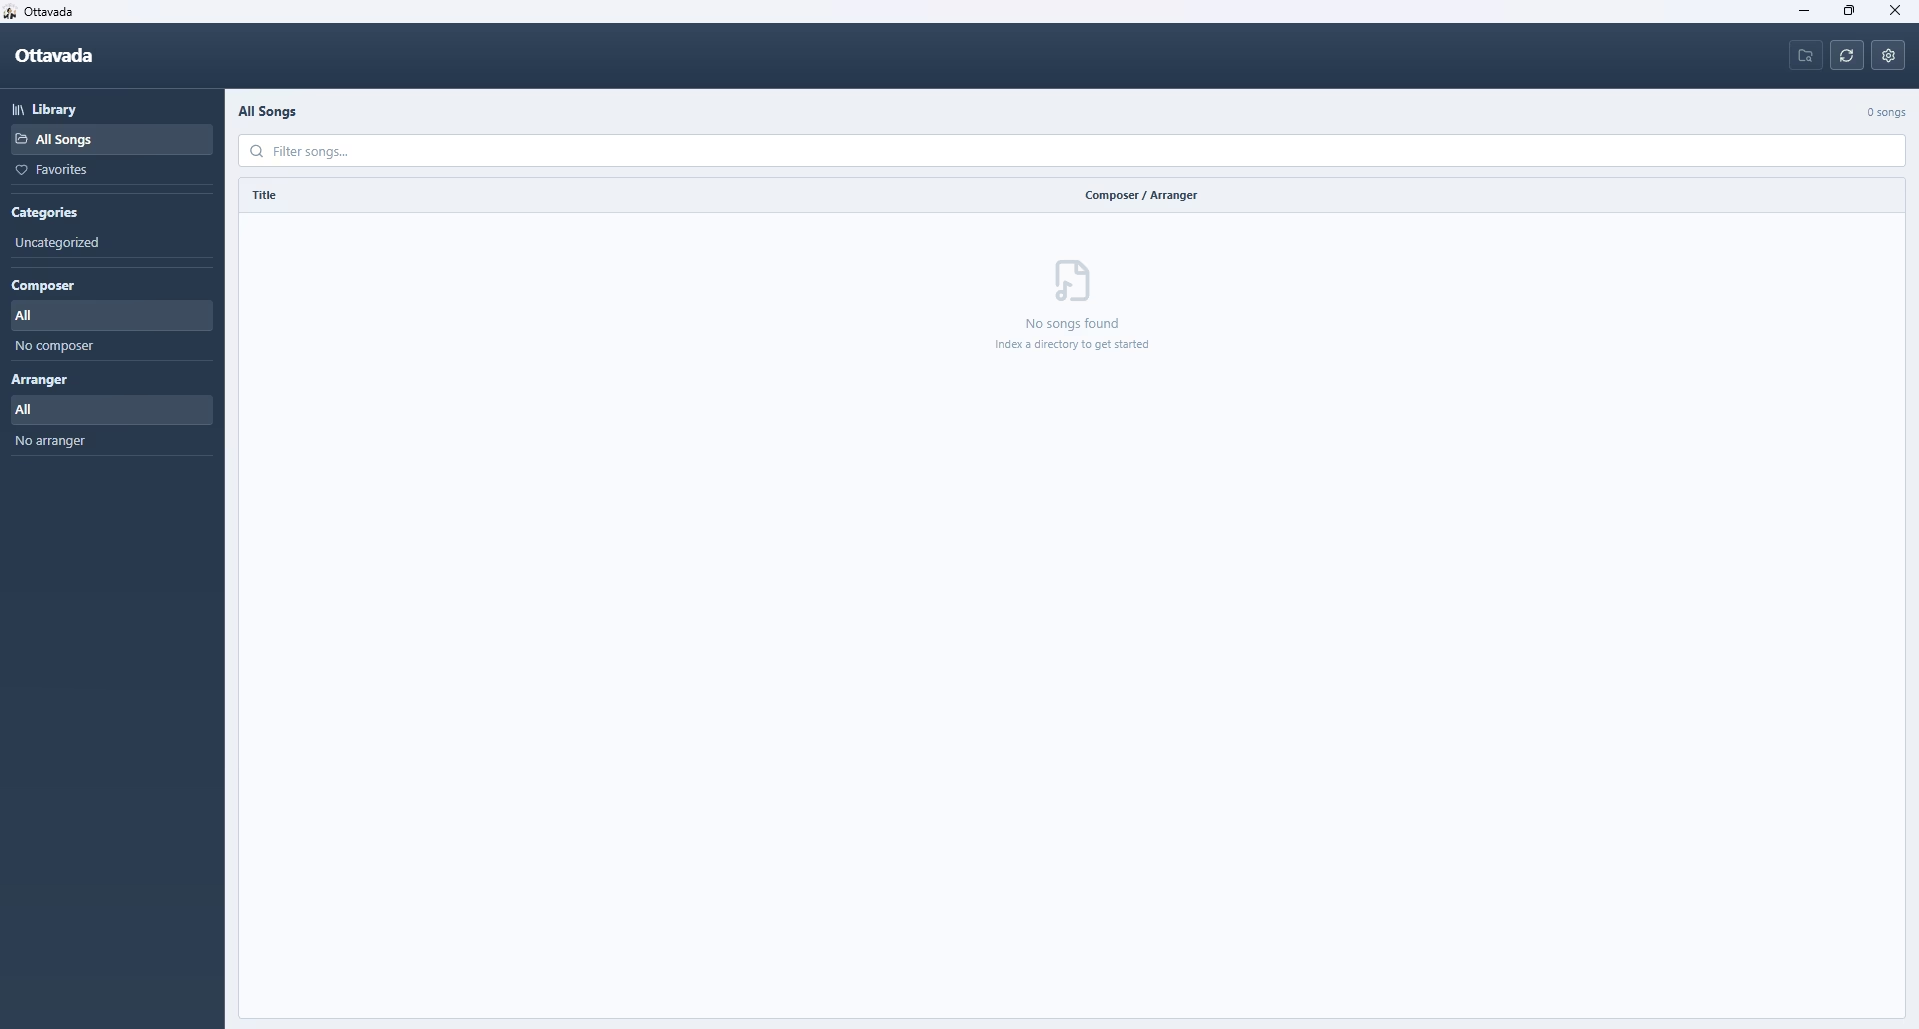
View Mode
Installing in View Mode
The process is the same as the installation topic. The only difference is that, in step 2, you select View Mode.
You must use the same cloud provider (Koofr or Google Drive) and the same account that is on the Manage Mode. Otherwise, the computers will not be able to exchange information.
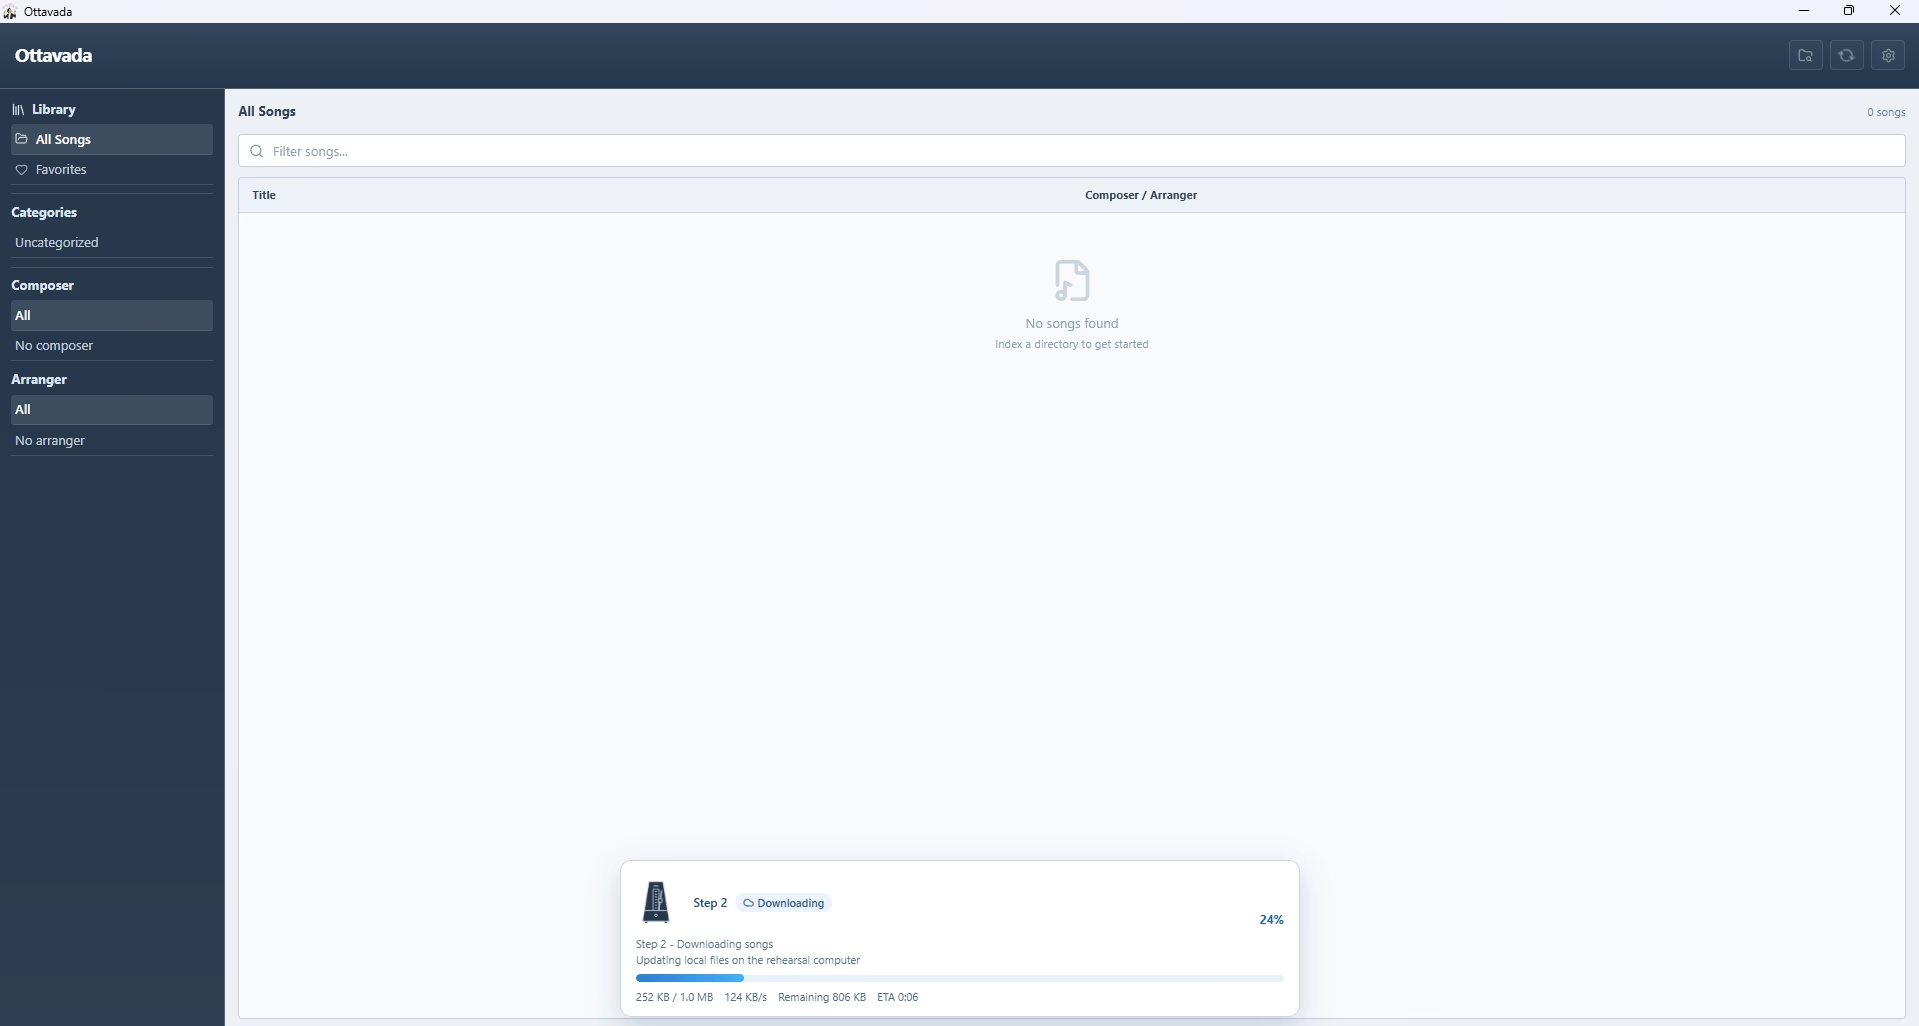
On the Ottavada home screen, click the sync icon.
The download progress for songs and scores will be shown.
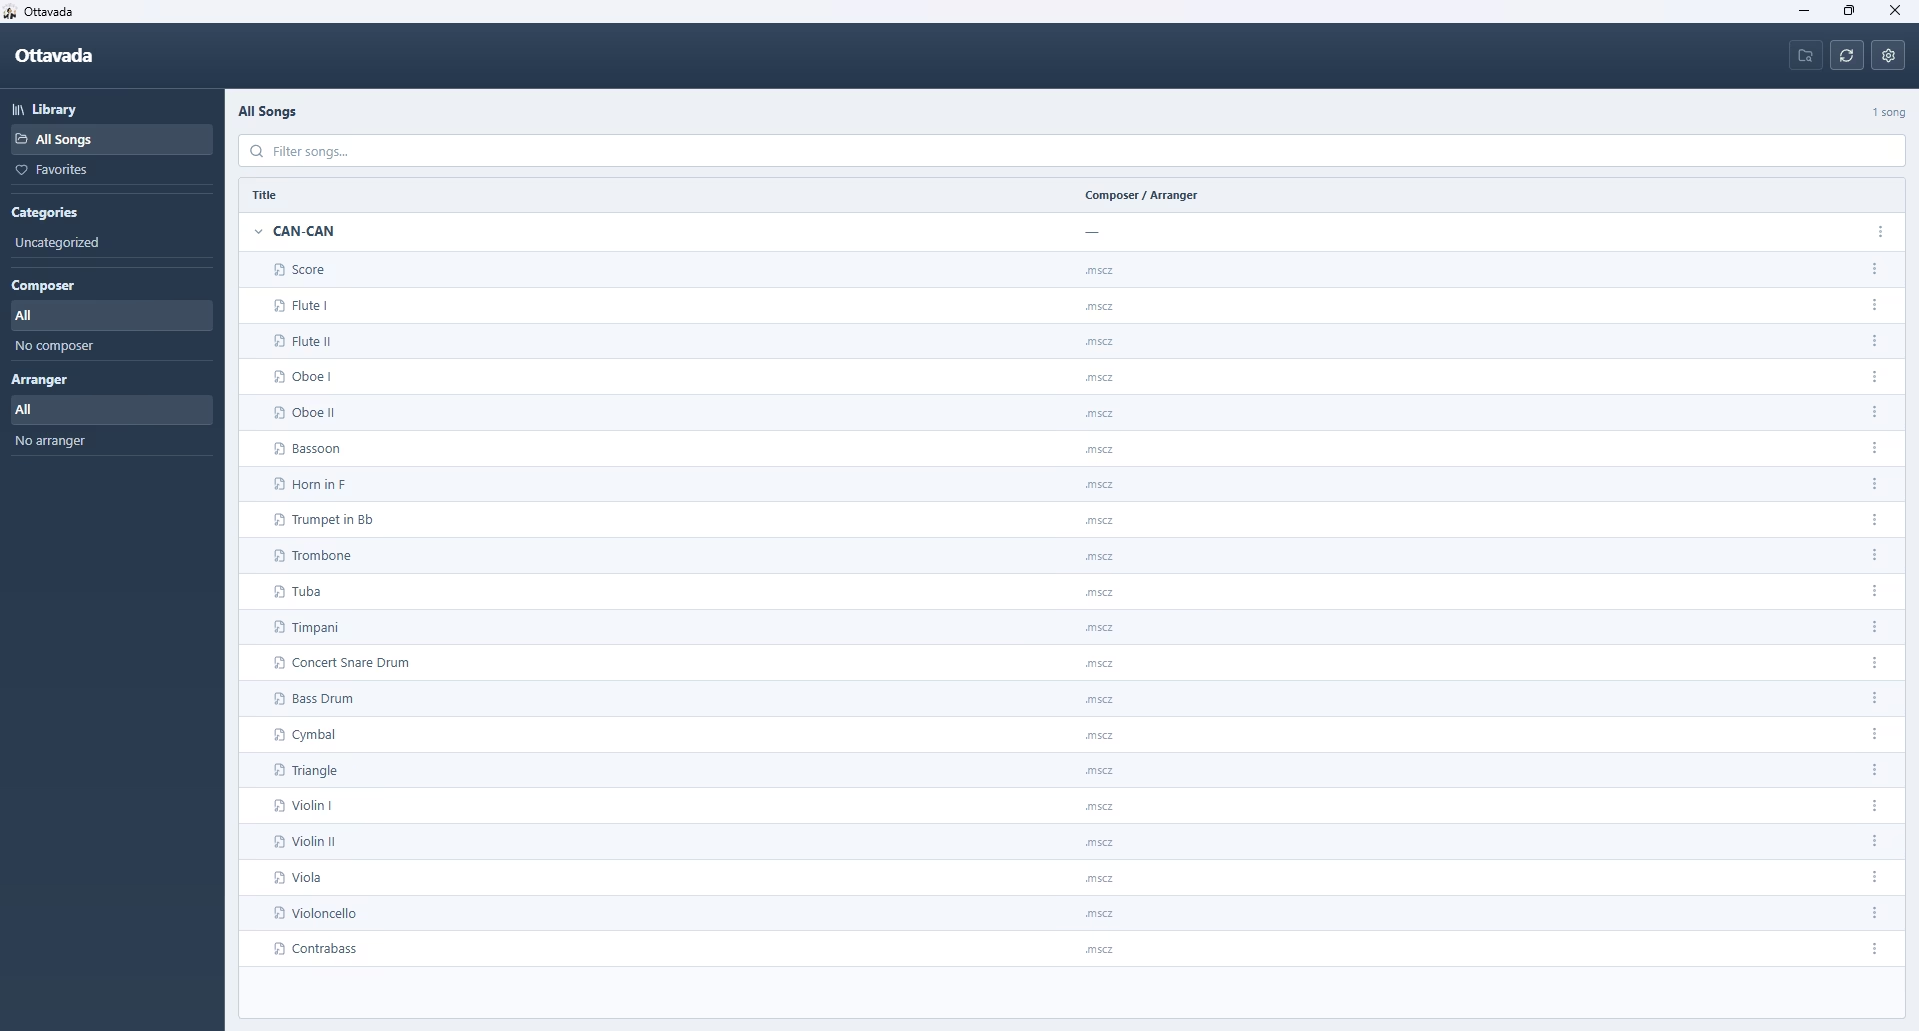
And that's it, that simple. What was added, modified, or even removed on the Manage Mode already appears on the View Mode. In our example only an addition and a change were made (the Oboe I score was changed, but since it was set to status send allowed it appeared).
Restoring a backup
Let's simulate that your computer broke and you bought a new one, and you need to recover all the songs/scores. It is very simple and they come back in the same place they were on the old computer.
You need to install Ottavada on the computer and follow the installation procedures; in step 2, select Manage Mode and use the same cloud provider and credentials (for Koofr, email and app password; for Google Drive, account access).
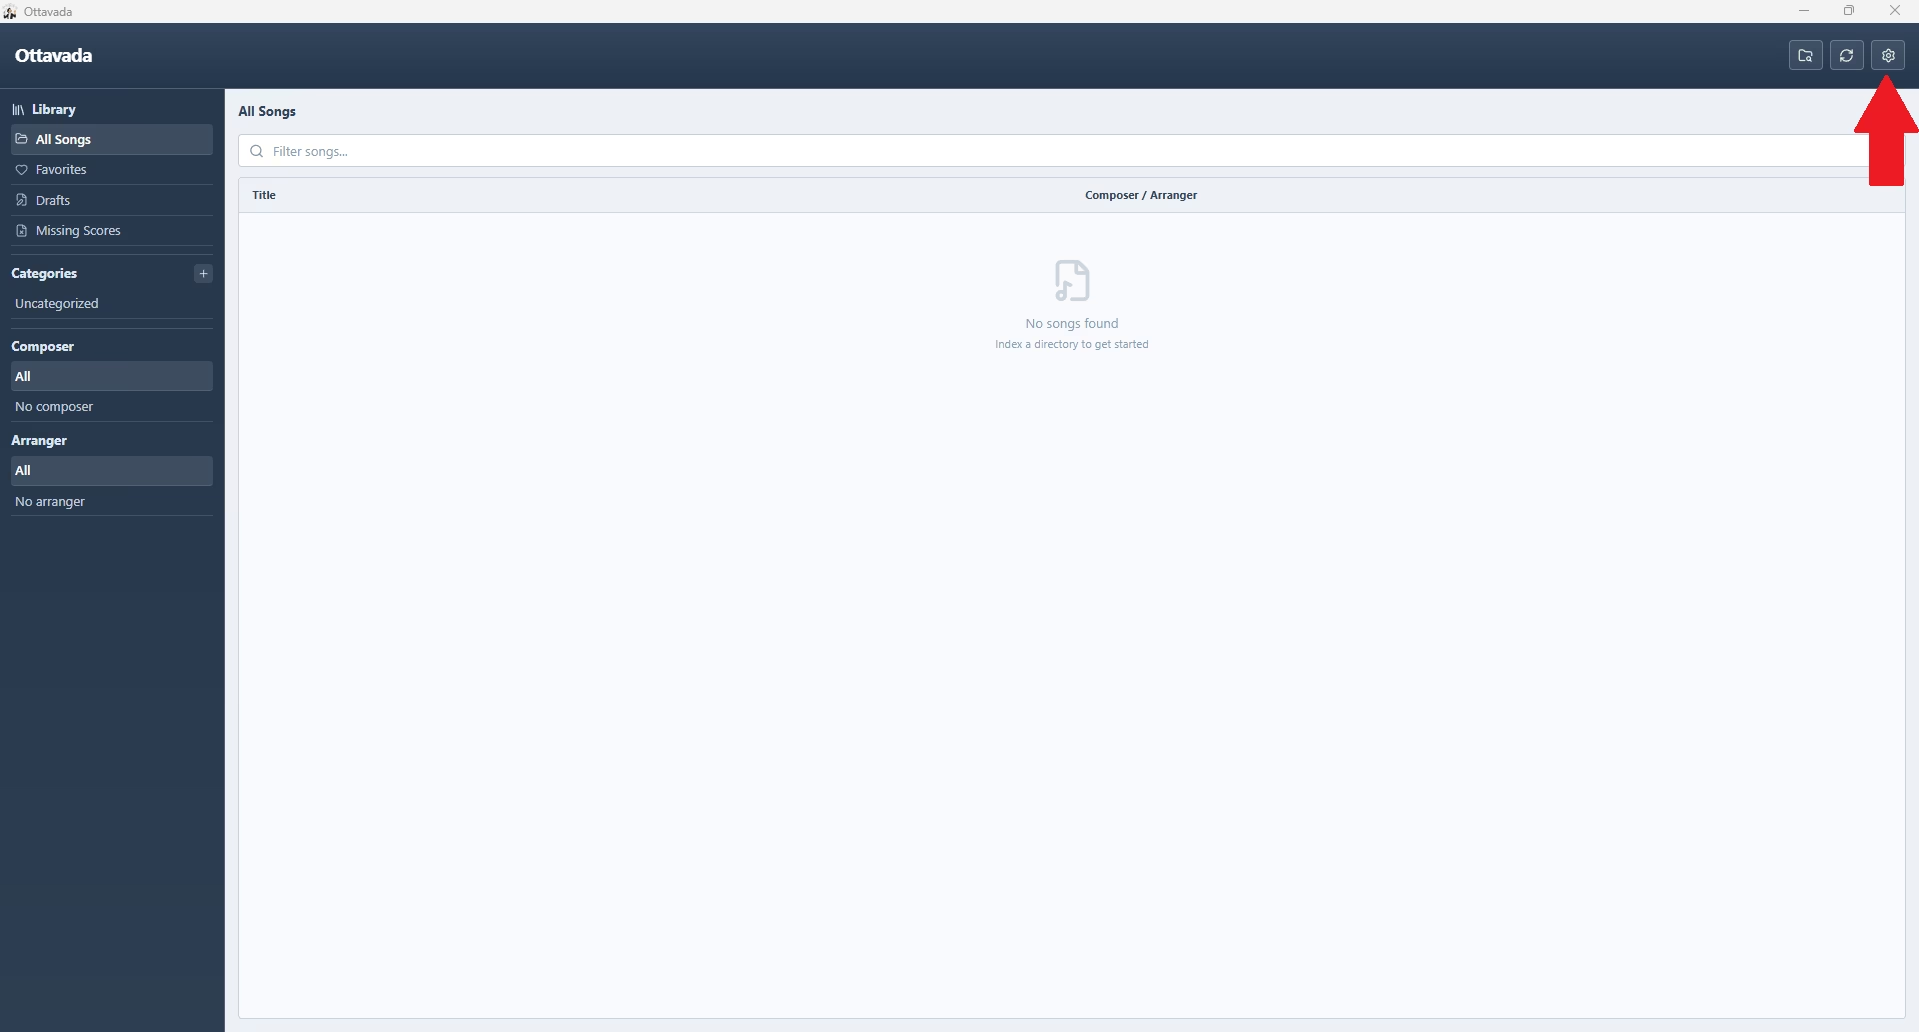
Just go to settings (gear icon).
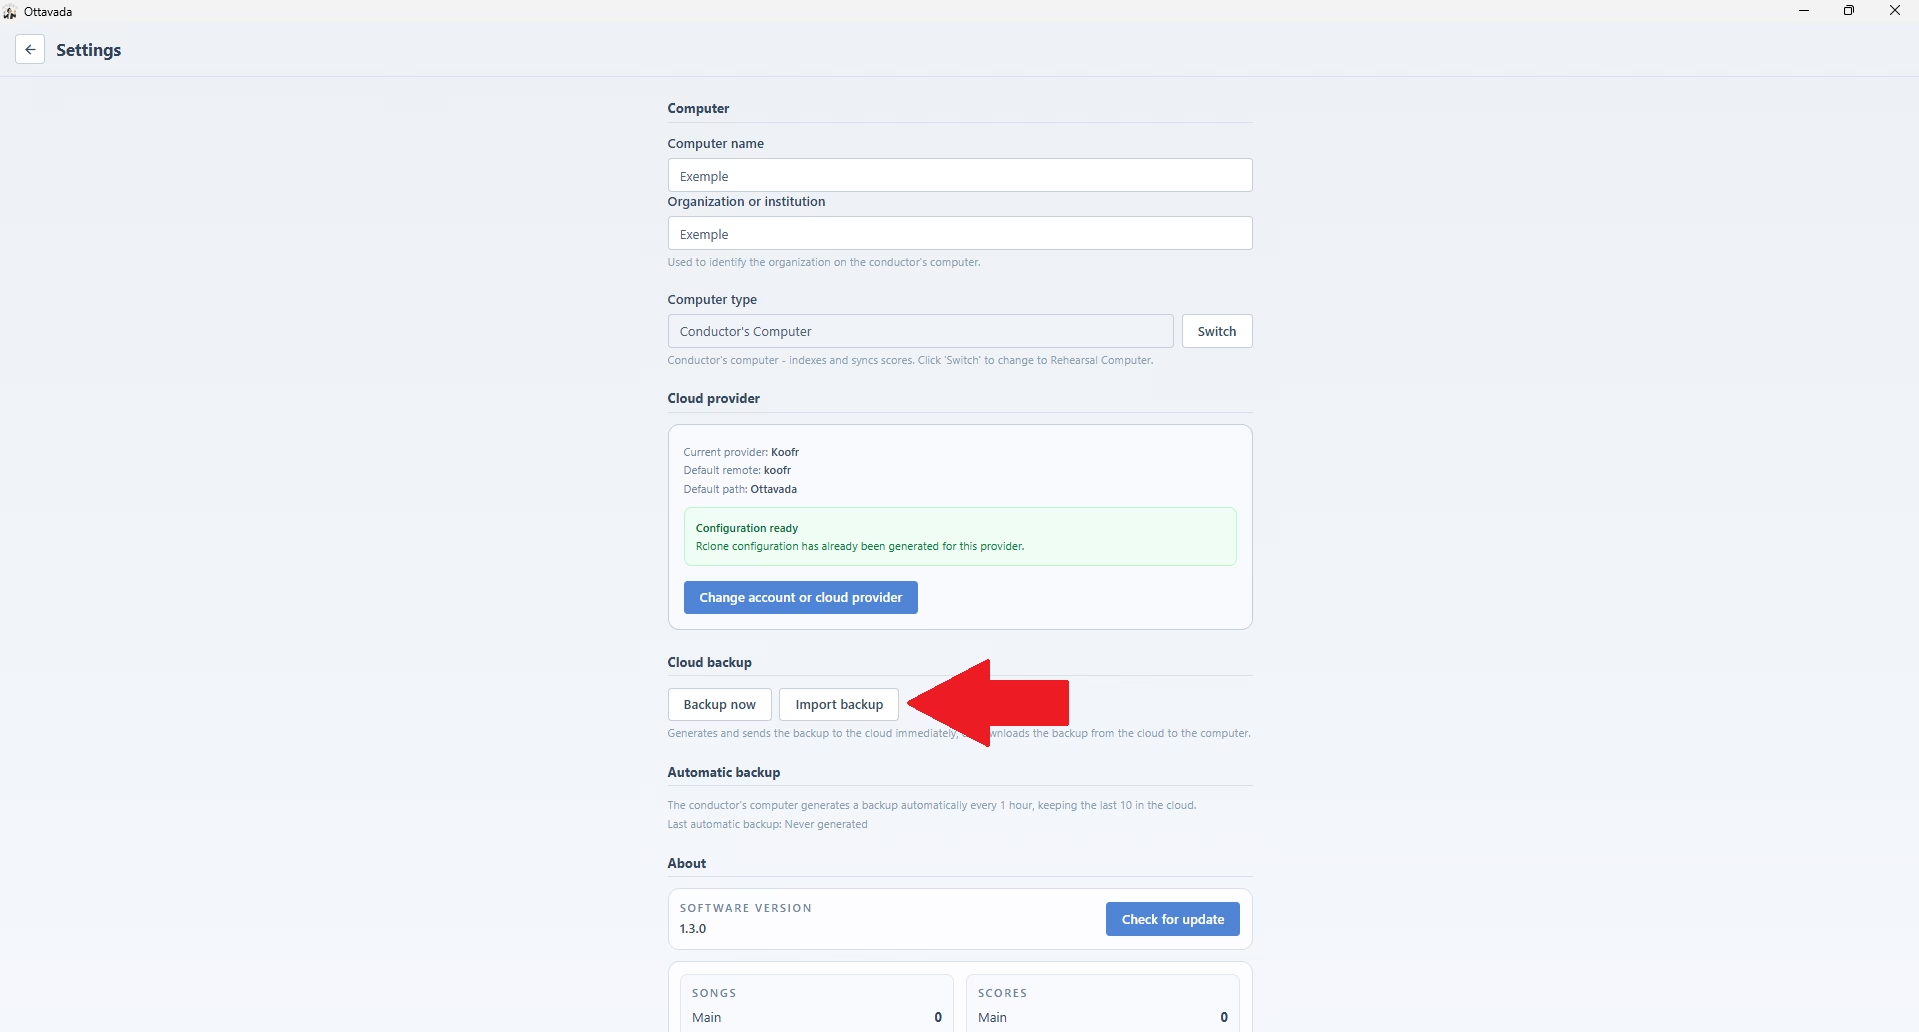
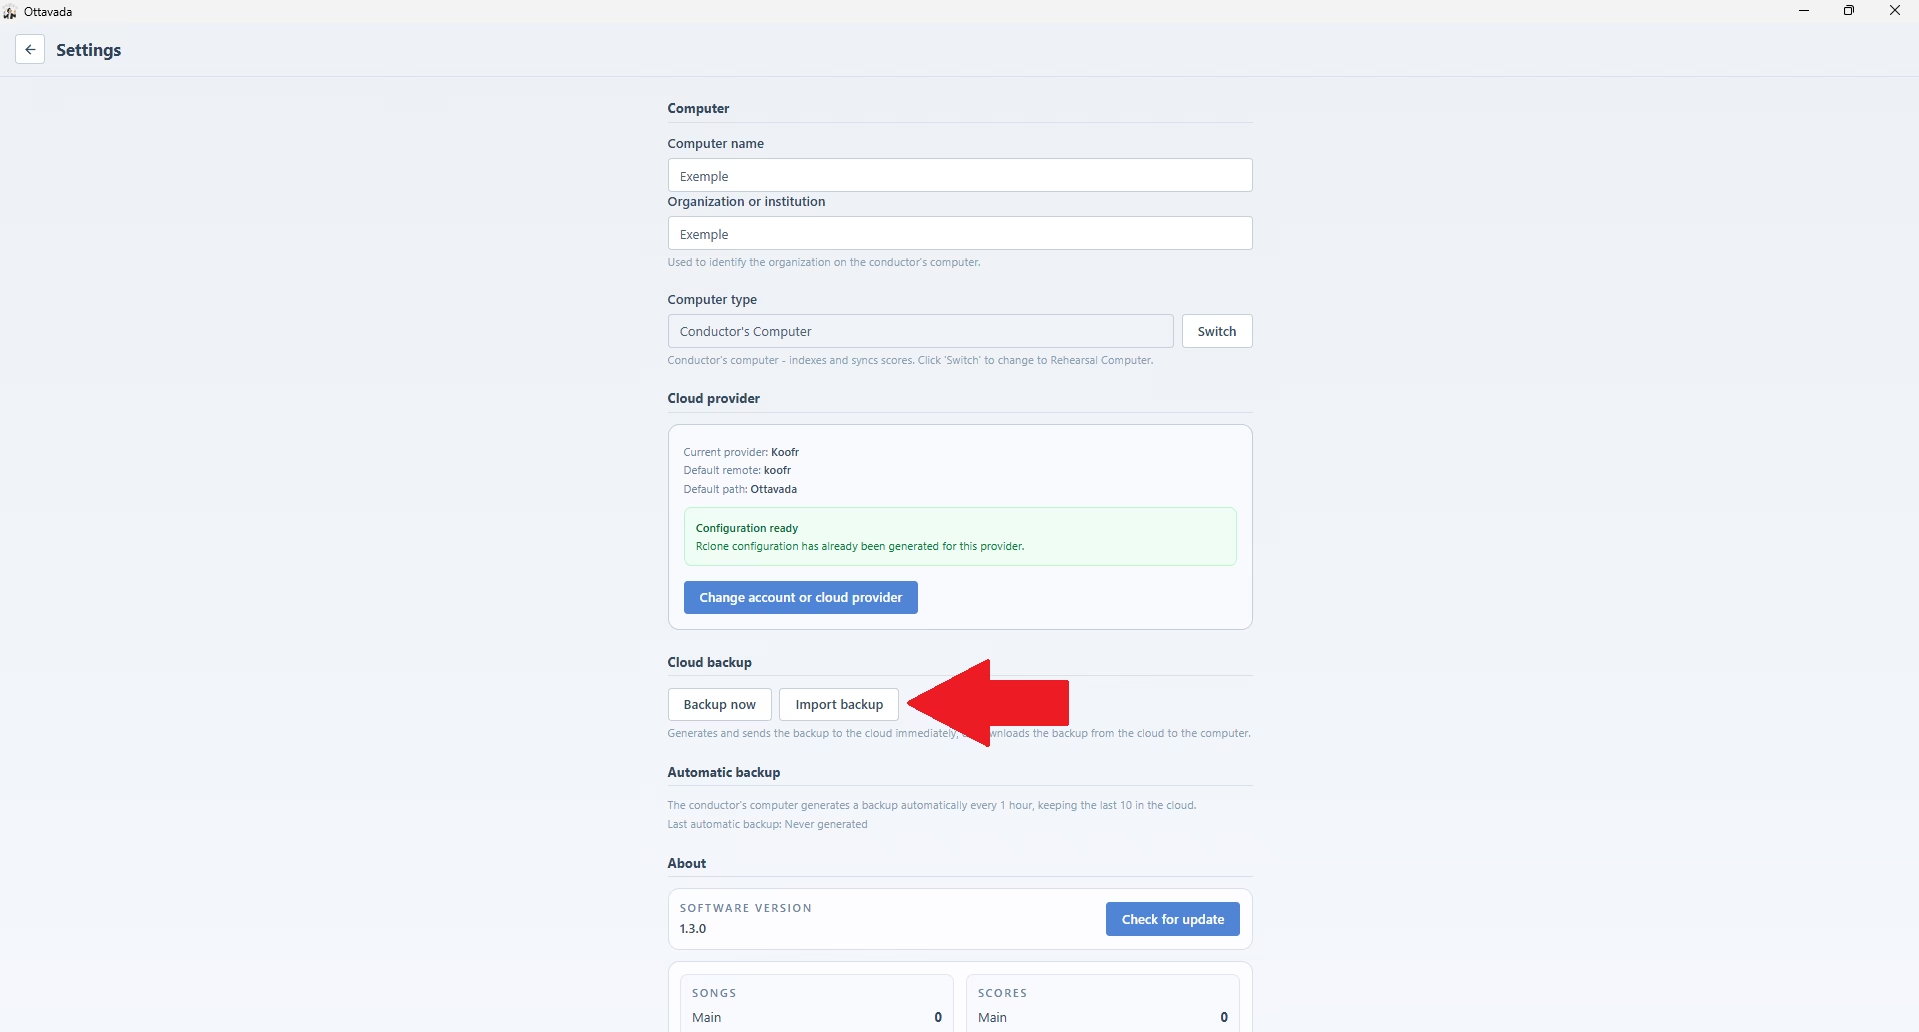
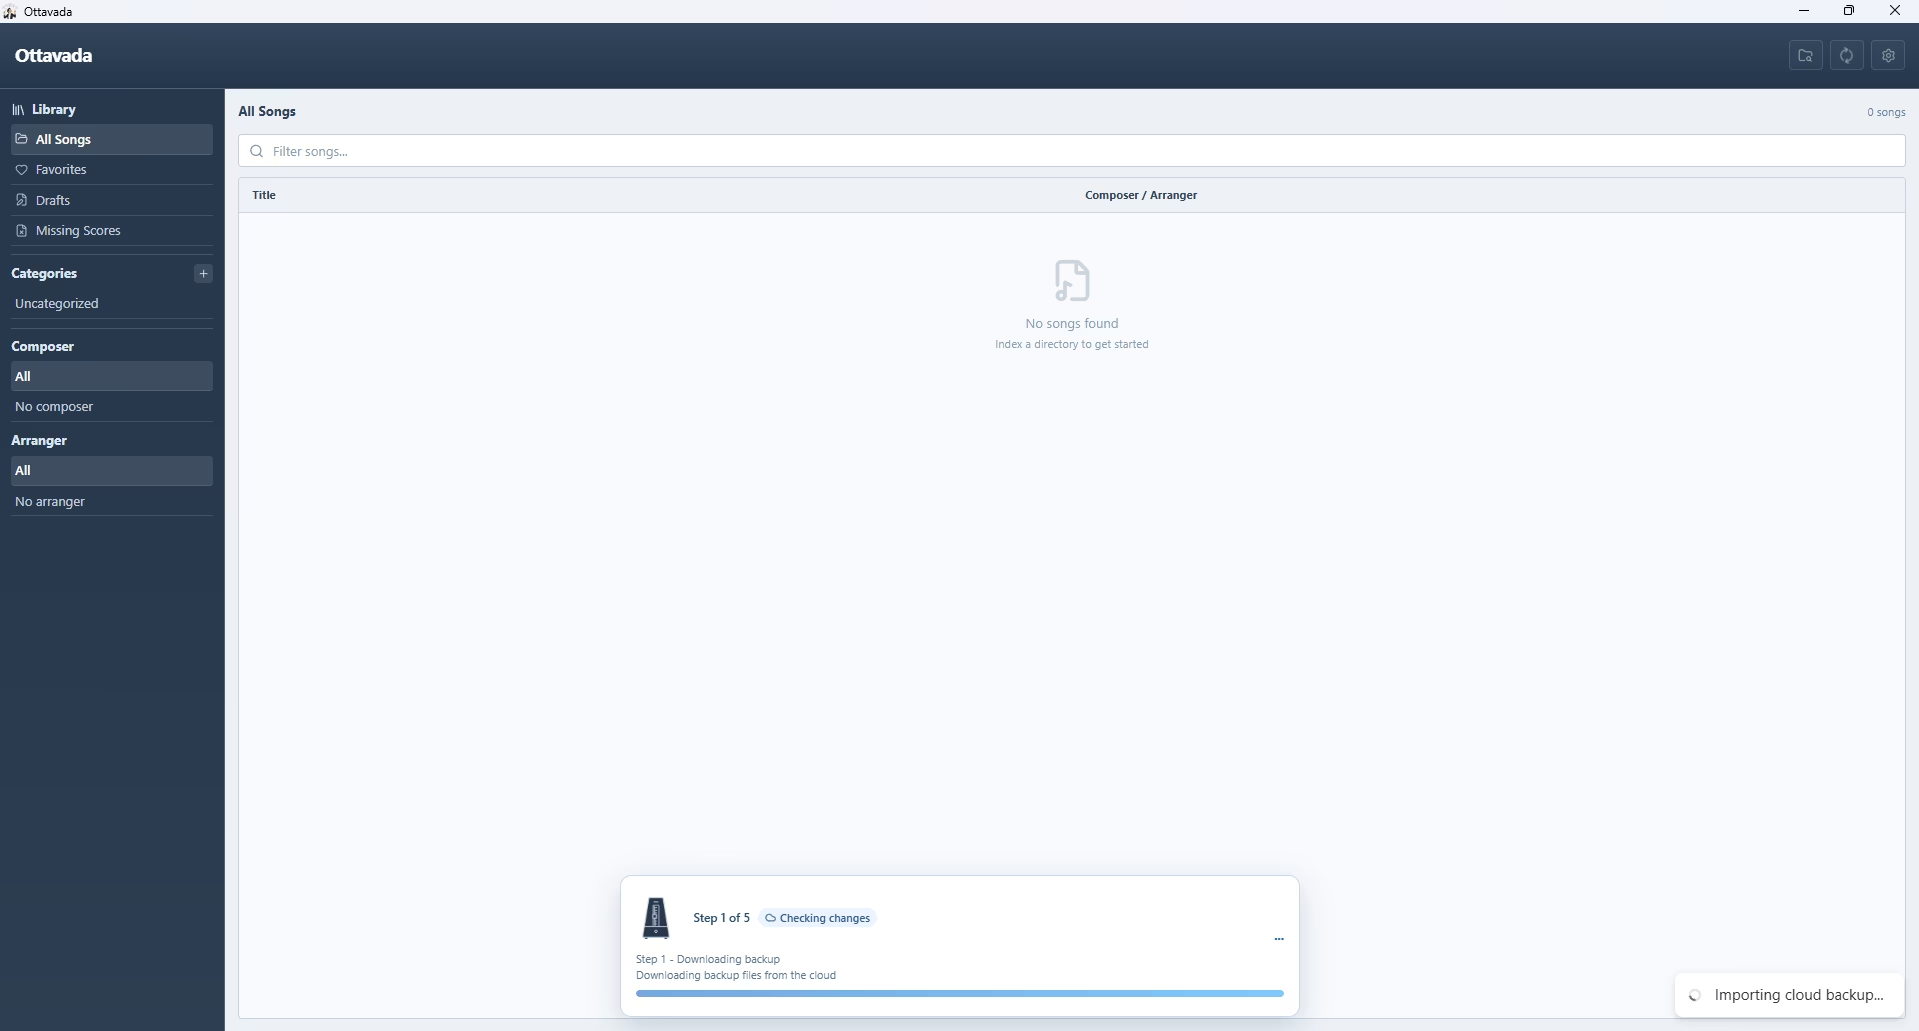
Scroll down to the cloud backup section and click import backup.
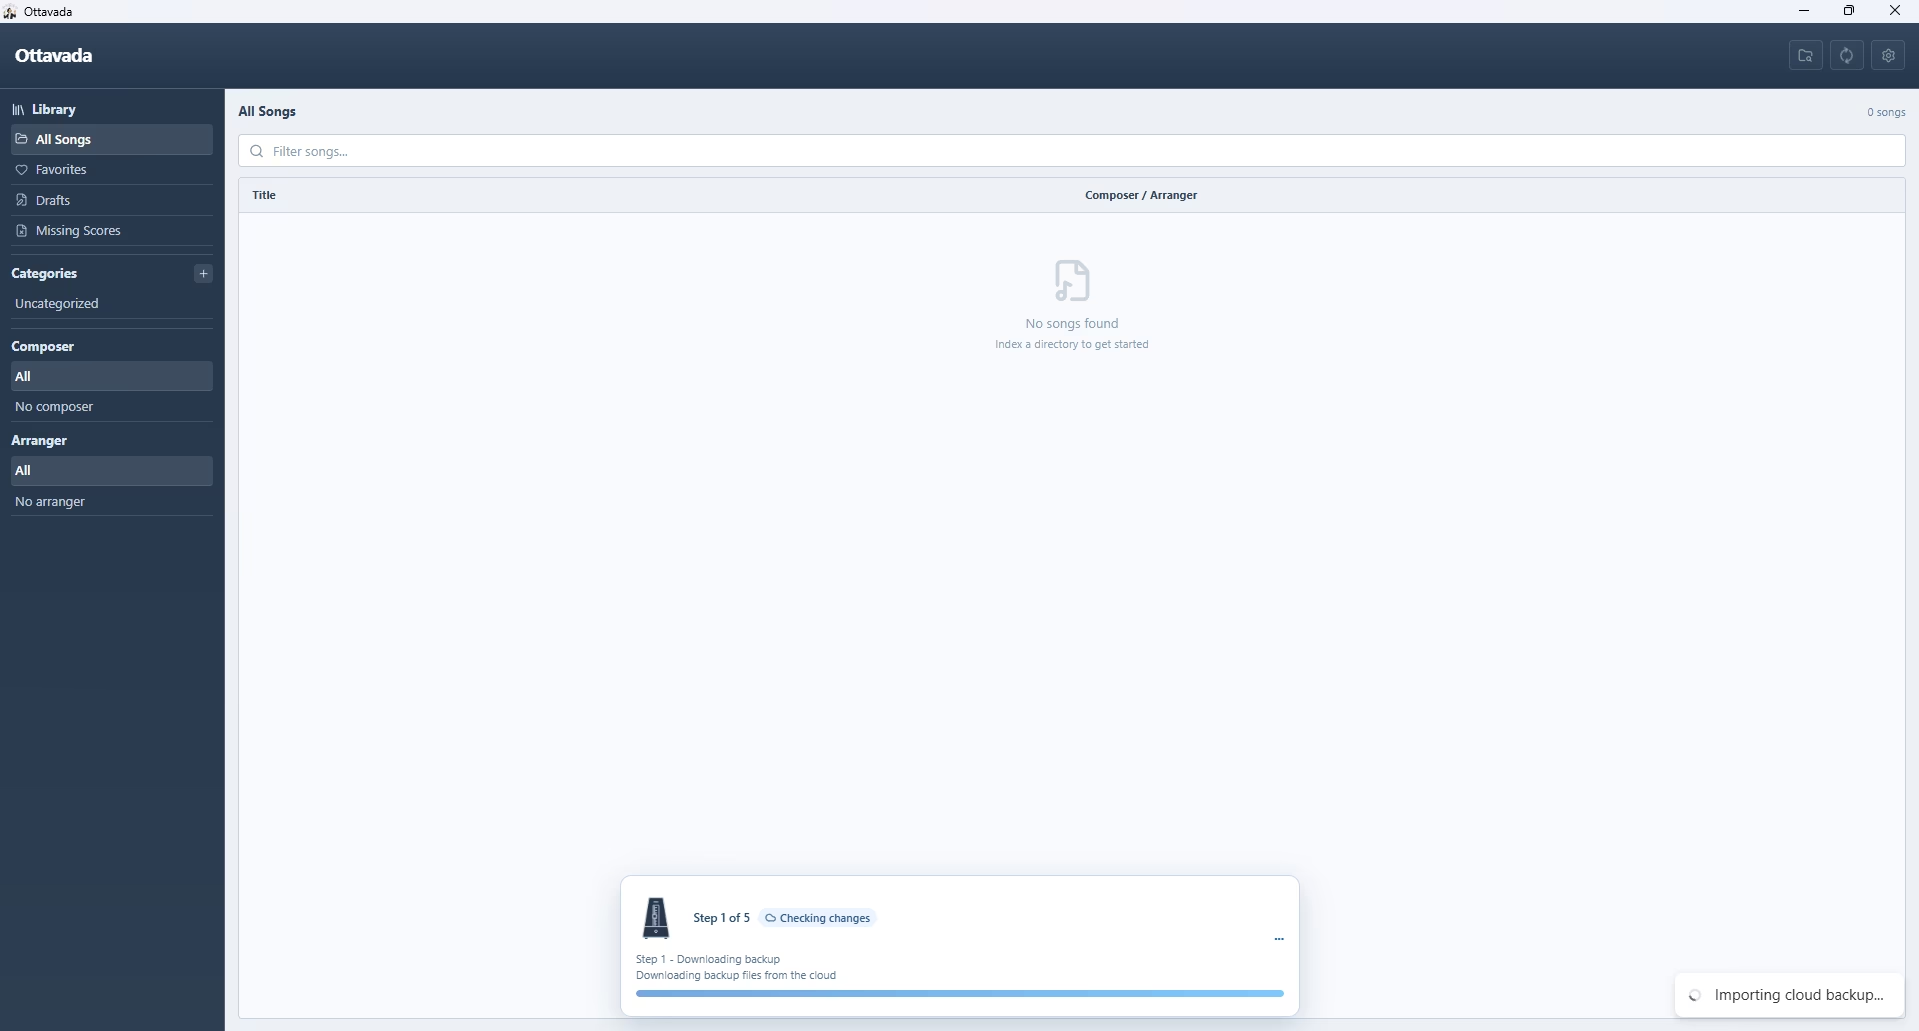
The progress will be shown and at the end the files will be in the original folders and also in Ottavada.
Support
If you have any questions, contact us by email ottavada@hotmail.com or use the chatbot in the lower corner of the screen.